Pihole and Cloudflare Gateway Event
Lab Guide (Click to Expand Navigation)
If you have any questions during this exercise, please send an email to:
cloudflare-gateway-pihole-support@cloudflare.com
Overview
In this exercise, you will configure Pihole (recursive DNS) to Cloudflare Gateway via DNS-over-HTTPS (DoH) and we enforce policies you create.
Cloudflare Gateway is part of Cloudflare for Teams. Cloudflare Gateway sits between your users, device or network and the public Internet.
Once you set up Cloudflare Gateway, the service will inspect and manage all Internet-bound DNS queries.
When a user makes a DNS request to Gateway, Gateway matches the request against the content or security categories you have set up for your organization. If the domain does not belong to any blocked categories, or if it matches an Override policy, the user’s client receives the DNS resolution and initiates an HTTP connection.
Why Pi-hole?
Pi-hole has become incredibly popular over the past few years. As websites become increasingly polluted with advertisements, surfing the web becomes seems more like a chore than the enjoyment it used to provide.
Ad-blocking browser plug-ins have been available for quite some time however, web application developers learned how to determine if someone has an ad-blocker installed in their browser and can take evasive actions. They typically will send you “nag” messages telling you to disable your ad-blocker, or restrict your ability to view content.
Most advertisments are merely hyperlinks to resources on other websites. As a page loads, your computer (or mobile device) is sending DNS requests to resolve, not only the URLs for the intended website, but also for the embedded links to advertisements.
As usual, there’s a better way to build a mousetrap!
The people that developed Pi-hole combined a DNS resolver, a database of domains commonly associated with advertisments, and a technique known as DNS Blackholing to deliver a solution that effectively prevents advertisements from being displayed in your browser.
Is it perfect? No.
Have web application developers started to compensate for the large Pi-hole user population? Absolutely!
But there is still plenty of enjoyment to be had by running Pi-hole!
One area that Pi-hole does not focus on is security! Enter Cloudflare…
Cloudflare Gateway’s DNS filtering protects networks from malware, phishing, ransomware and other security threats.
Steps to Success!
Building upon the prework we sent out late last week, this lab will take you through the following steps:
Provision Cloudflare for Teams & Cloudflare Gateway
Install Pi-hole
Install and configure Cloudflare Tunnel (DNS-over-HTTPS)
Configure Pihole to forward upstream requests to Cloudflare Gateway
Configure Cloudflare Gateway Policies
Provision Cloudflare for Teams and Cloudflare Gateway
In this section, we will enable Cloudflare for Teams. Cloudflare for Teams includes: Cloudflare Access Cloudflare Gateway Cloudflare Remote Browser Isolation
Navigate to https://dash.cloudflare.com
Click the Access tab along the top of the page and click Enable Access

Click Next on the Welcome to Cloudflare for Teams! page
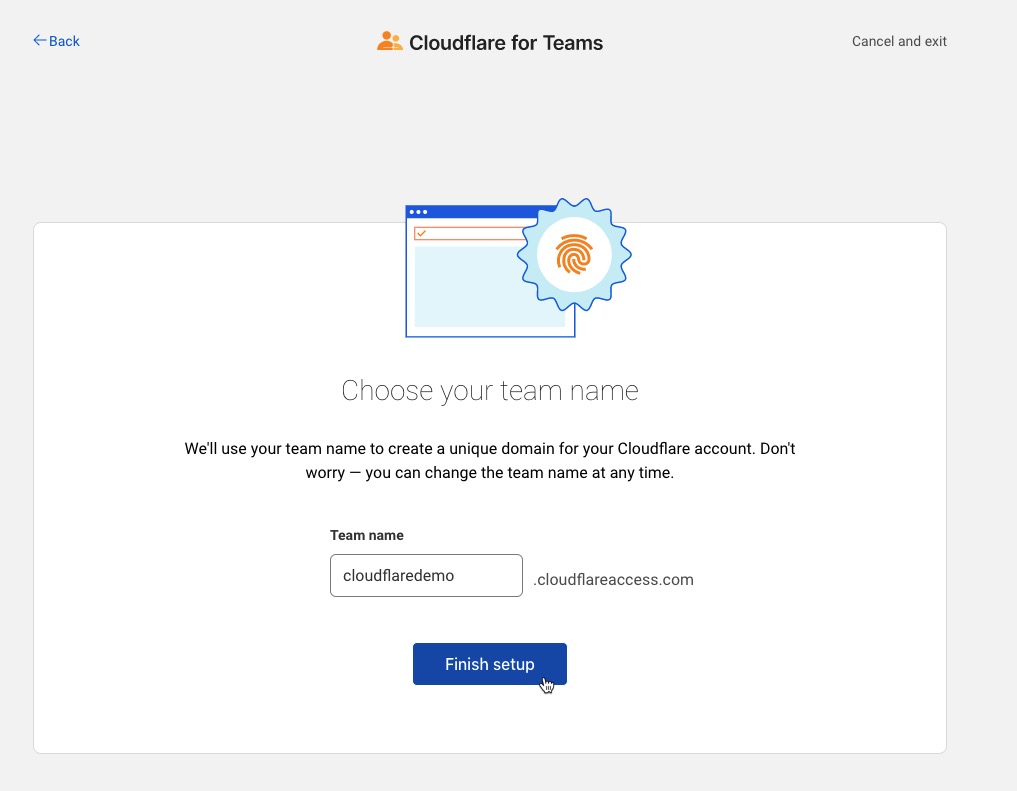
Select a Team Name - this doesn’t apply to this exercise, but it is a required step to enable Cloudflare for Teams
On the Welcome Aboard! page, expand the Gateway section on the left side of the page
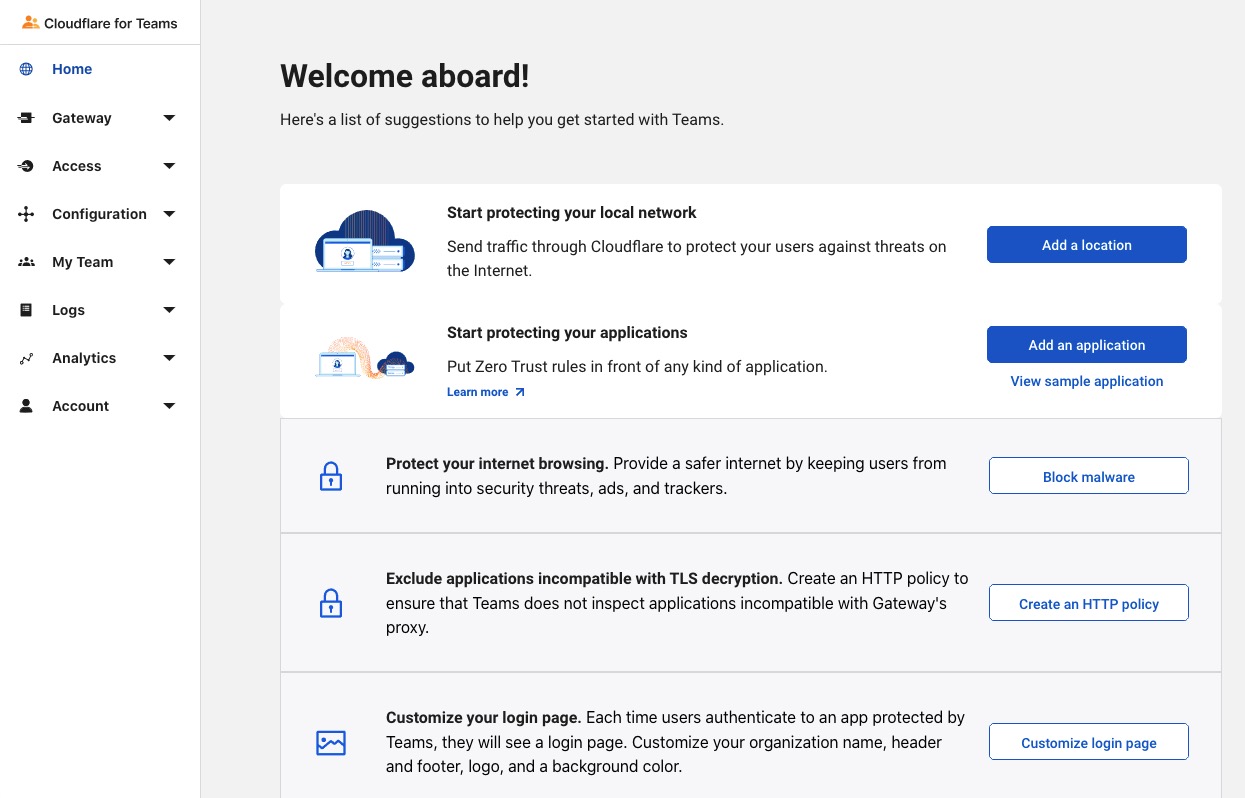
Click the Add a Location link
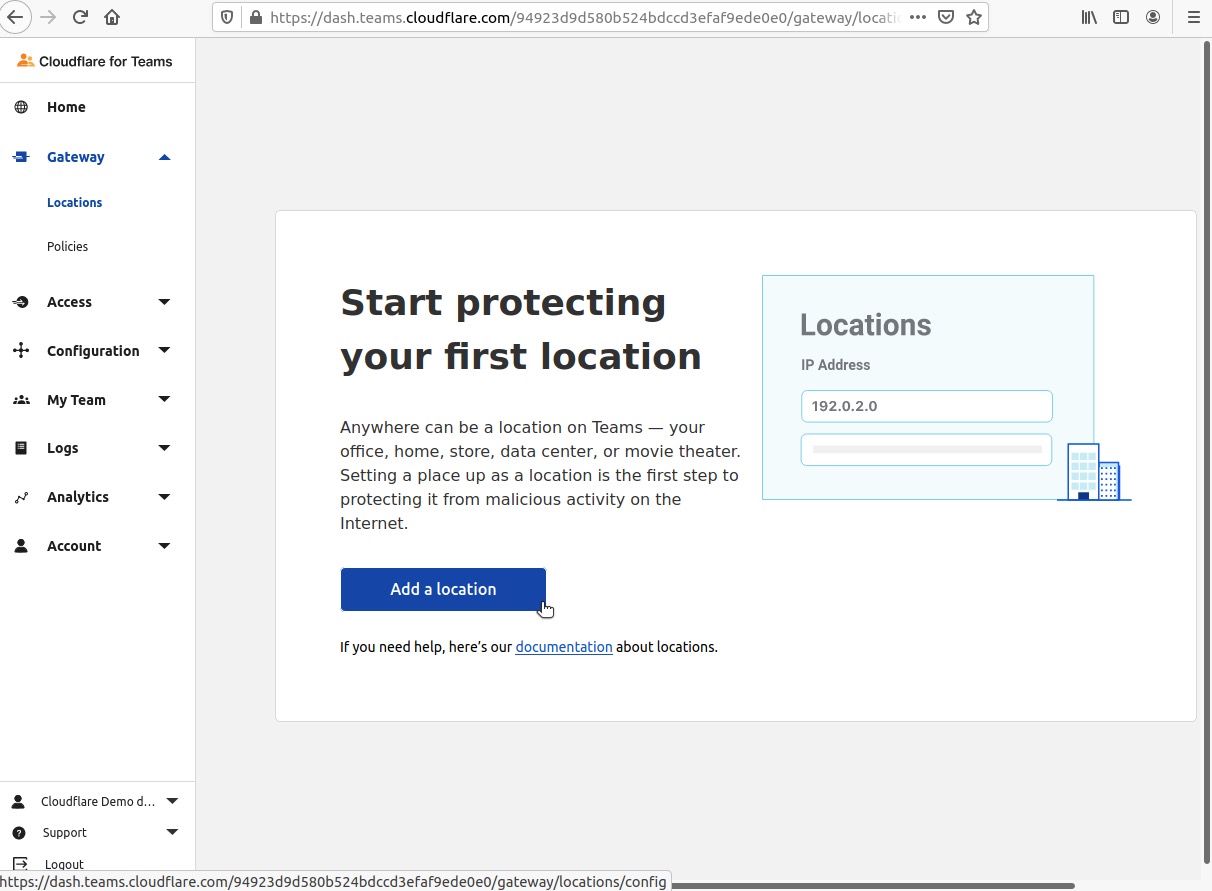
Provide a Name for the location and specify the IPv4 Address (use a /32 netmask) and click Add Location
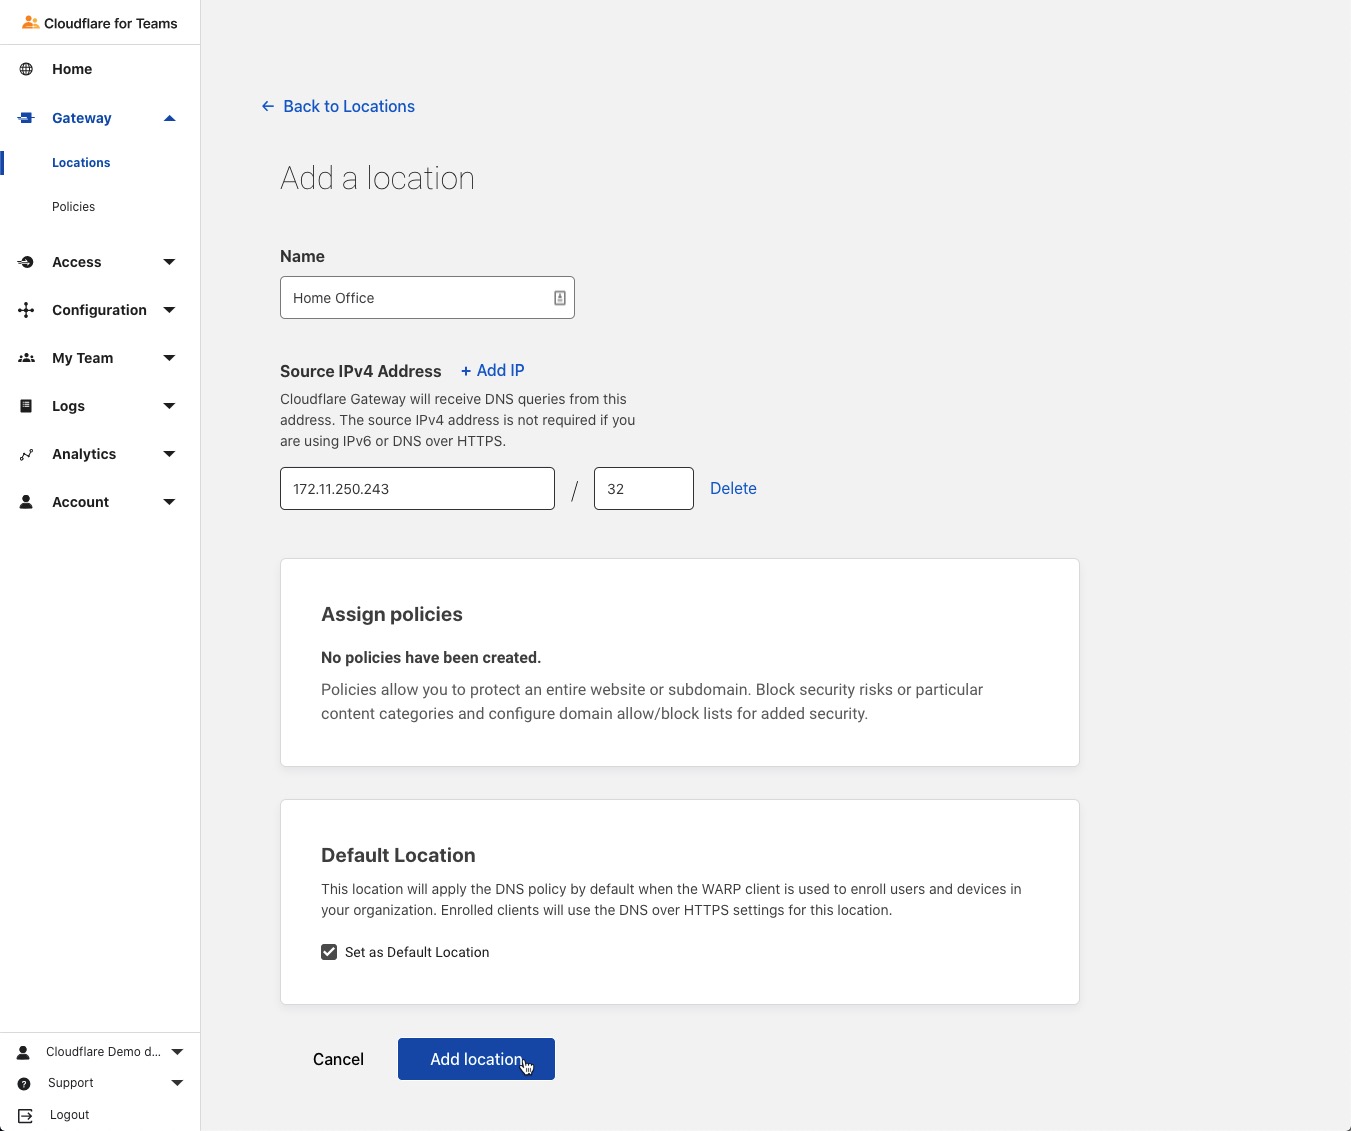
NOTE: If you don’t know your Source IPv4 Address, you can find this by running the following from the command-line interface on your Raspberry Pi Pi-hole server
  curl http://icanhazip.com

  172.11.250.243
Click Add Location
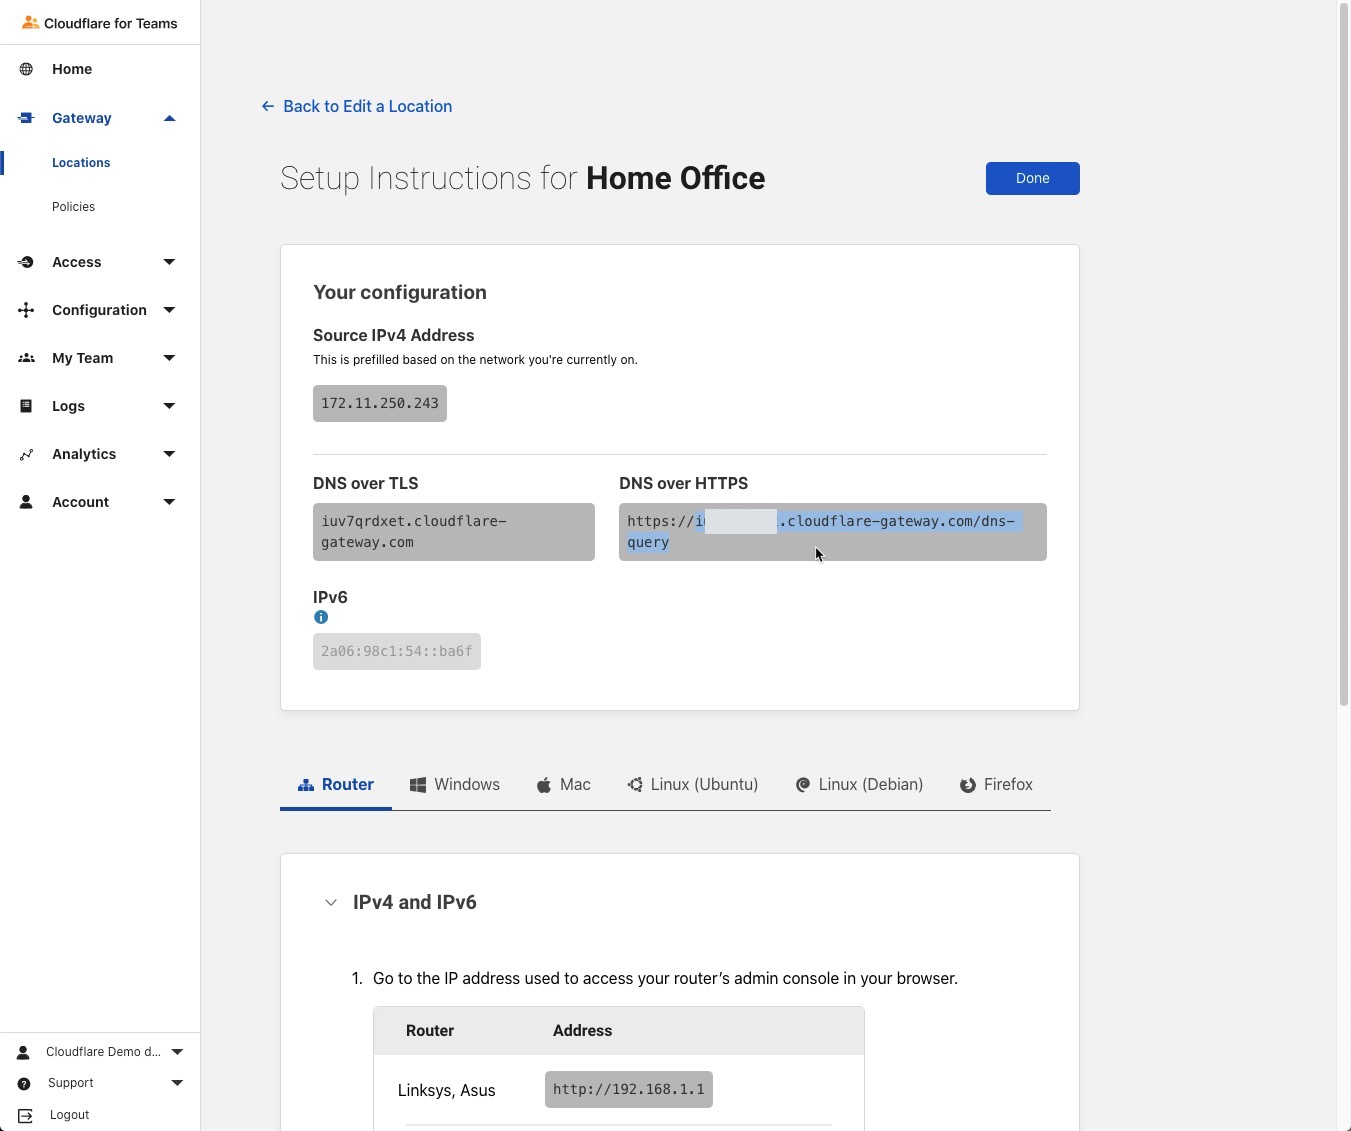
Click the name of the Location you created to expand the field and make note of the DNS over HTTPS URL as this will be needed when we set up Cloudflare Tunnel
What happens if my IP address changes? Will DNS resolution break?
Not at all! If your IP address changes, it will not have any impact on DNS resolution. Once we configure Cloudflare Tunnel to proxy upstream DNS requests via DNS-over-HTTPS, DNS resolution will be sent to the DNS-over-HTTPS URL which is unique to your account.
Install Pi-hole
Official Pi-hole website:
Pi-hole.net - https://pi-hole.net
Official Pi-hole repository on GitHub:
https://github.com/pi-hole/pi-hole
Choose Your Adventure!
There are three different methods of installing Pihole. Which method you use is largely up to you.
Using the “One-Step Automated Install”
curl -sSL https://install.pi-hole.net | bash
Cloning the official repository and running the installer
  git clone --depth 1 https://github.com/pi-hole/pi-hole.git Pi-hole
  cd "Pi-hole/automated install/"
  sudo bash basic-install.sh
Manually downloading and running the installer
  wget -O basic-install.sh https://install.pi-hole.net
  sudo bash basic-install.sh
Pi-hole Install Step-by-Step
Being the good security-minded professionals we are, let’s go with option 2 (above)!
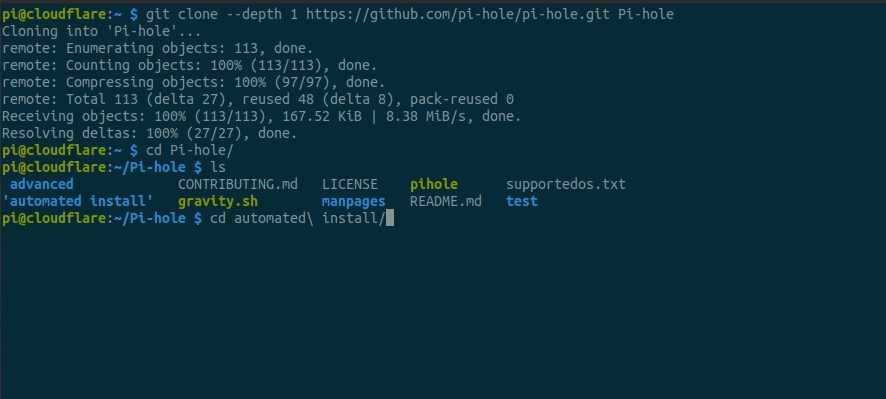
Begin by using git to clone the official Pi-hole repository:
git clone --depth 1 https://github.com/pi-hole/pi-hole.git Pi-hole

Change to the automated installer directory
cd automated\ install/
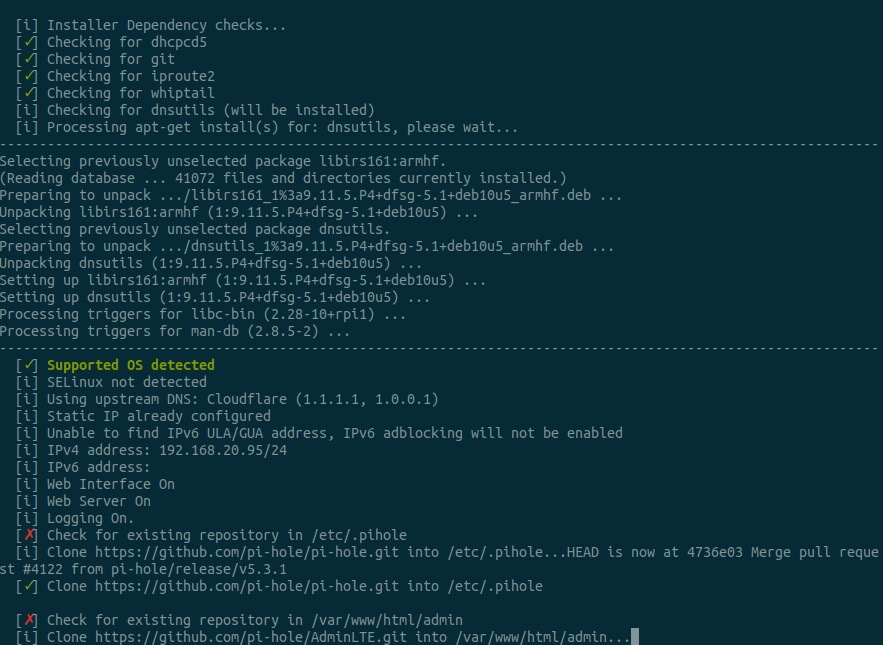
Begin the installation process
sudo bash basic-install.sh
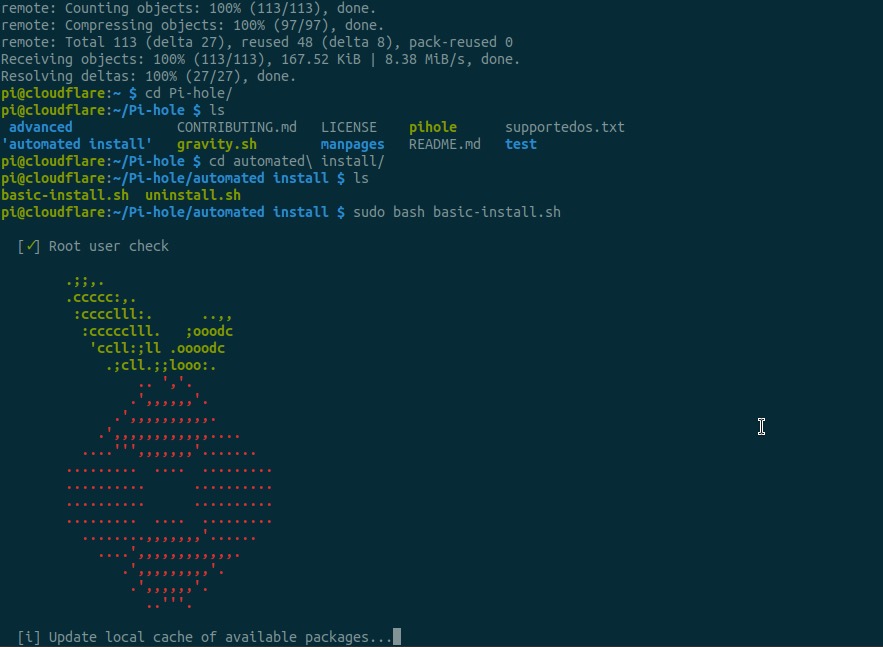
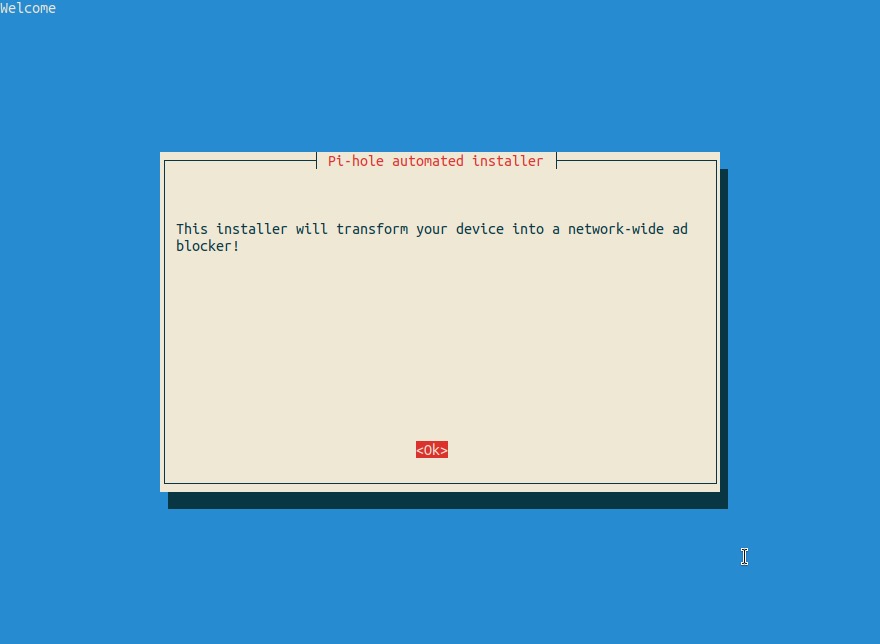
Buckle up and get ready for the “network-wide ad blocker!” - press enter to select OK
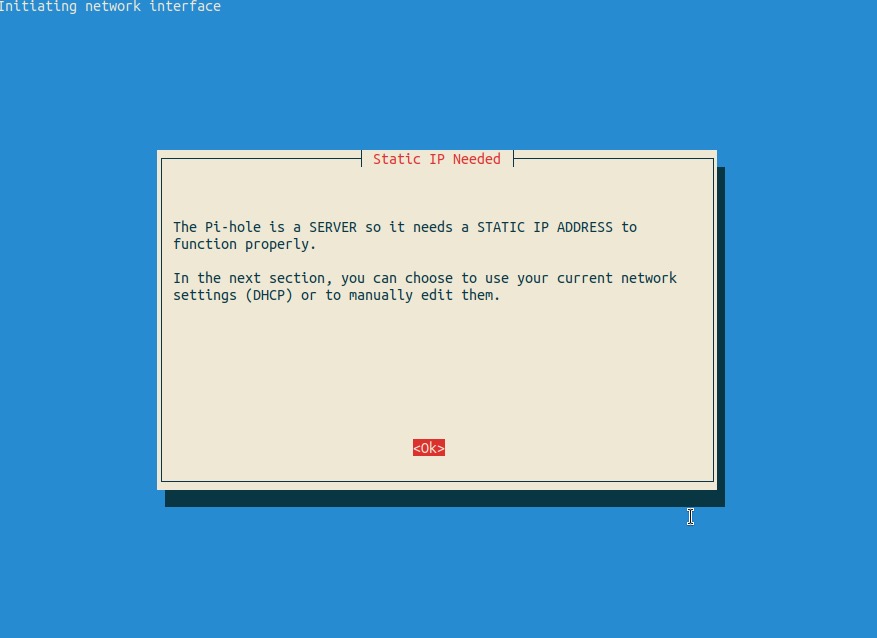
This is why we set a static IP address during the pre-work
NOTE: You may see an extra screen where you have to select a network interface - this will only occur if you have both the Ethernet and Wi-Fi interfaces configured. This shouldn’t be the case, but it’s not the end of the world. Just choose the one you configured with a static IP addres and proceed.
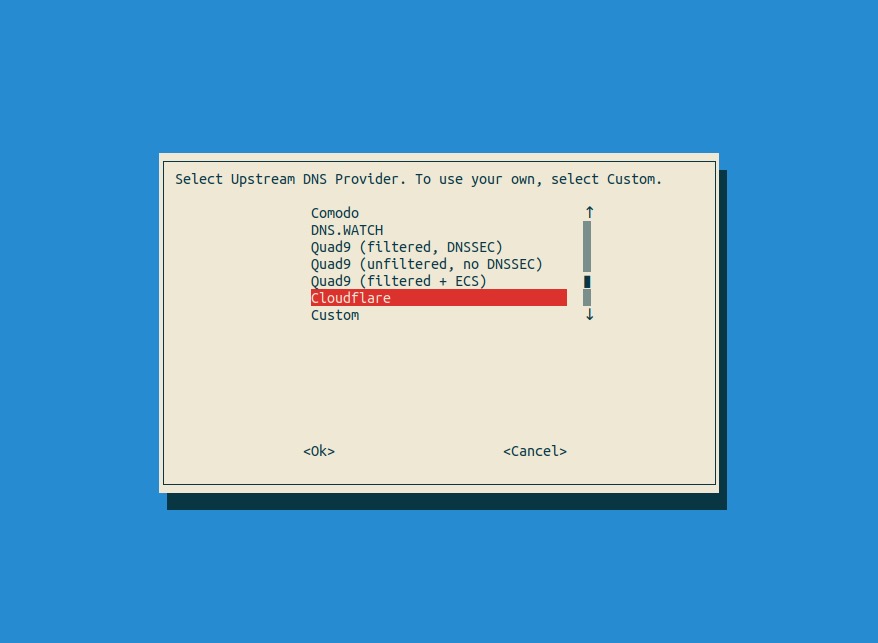
Select Cloudflare for your Upstream DNS Provider (we are the world’s fastest DNS resolver!)
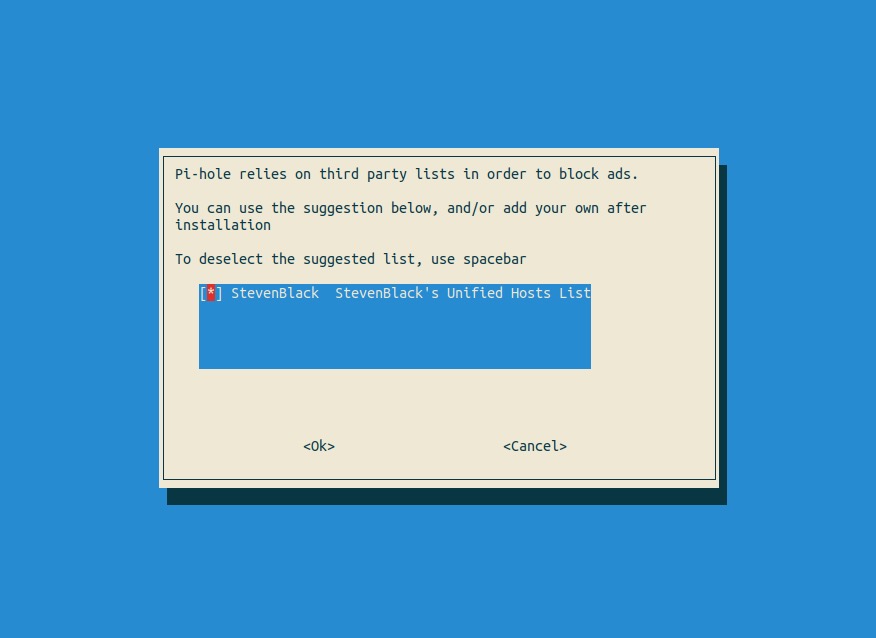
Leave the StevenBlack third-party ad blocker list enabled *
You might want to disable this list if you do not want Pihole to block ads - but it defeats the purpose of using Pi-hole as a DNS server in the first place.
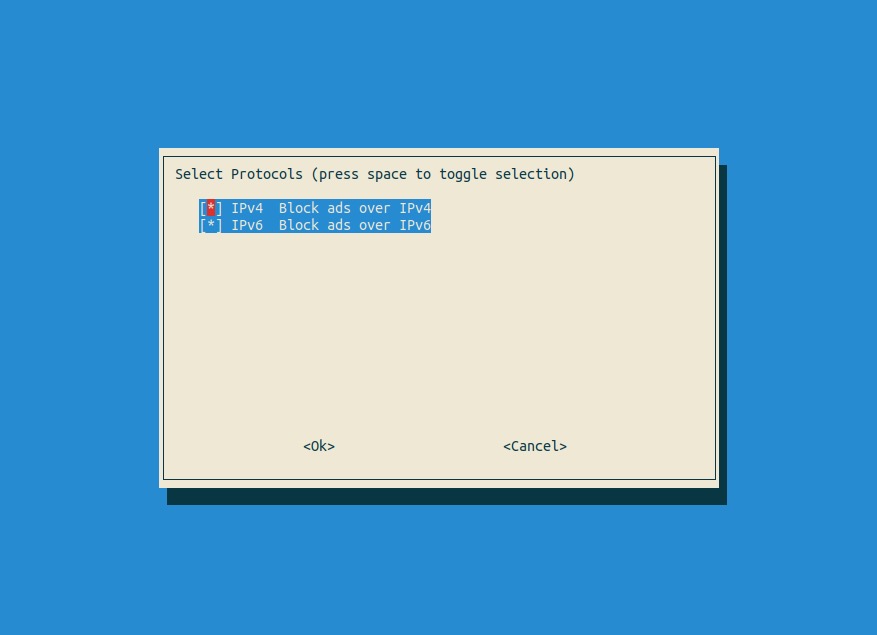
On the Select Protocols page, you can leave both selected - even if you disabled IPv6 as recommended during the pre-work - having the IPv6 option enabled won’t hurt anything
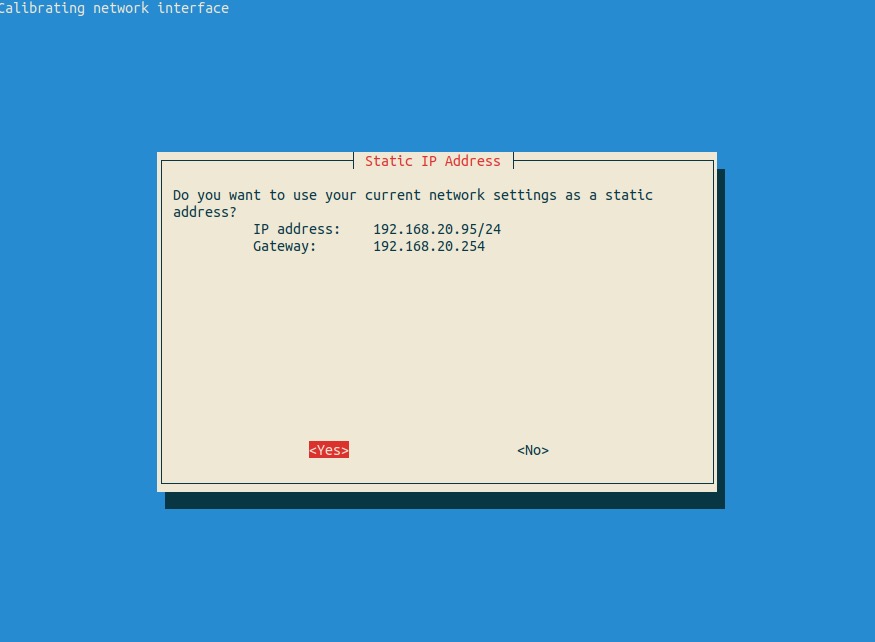
Confirm the static IP address that Pi-hole recognizes is correct
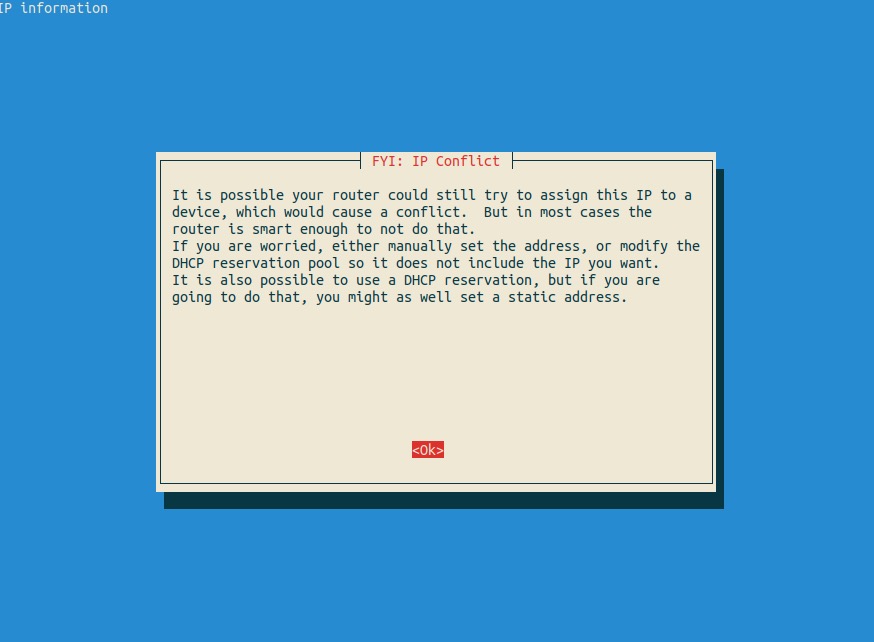
Review the static IP address conflict warning message. This is only to let you know that, in the event you selected a static IP address that falls within the same range as the DHCP addresses handed out by your router, there is a chance the DHCP server may try to assign the same IP address to another device.
Best practices dictate you should either:
Use an IP address outside of the range (preferred)
Create a DHCP reservation to prevent the DHCP server from attempting to assign the IP address to another host
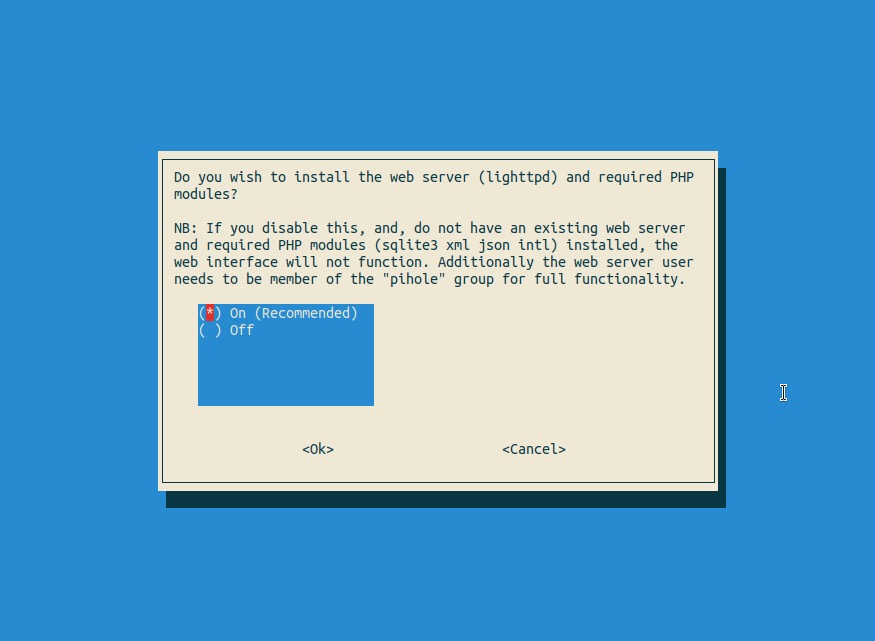
Yes - we want to install the web interface

Yes - we want to install lighttpd - a web interface without a web server would be pretty pointless, wouldn’t it?
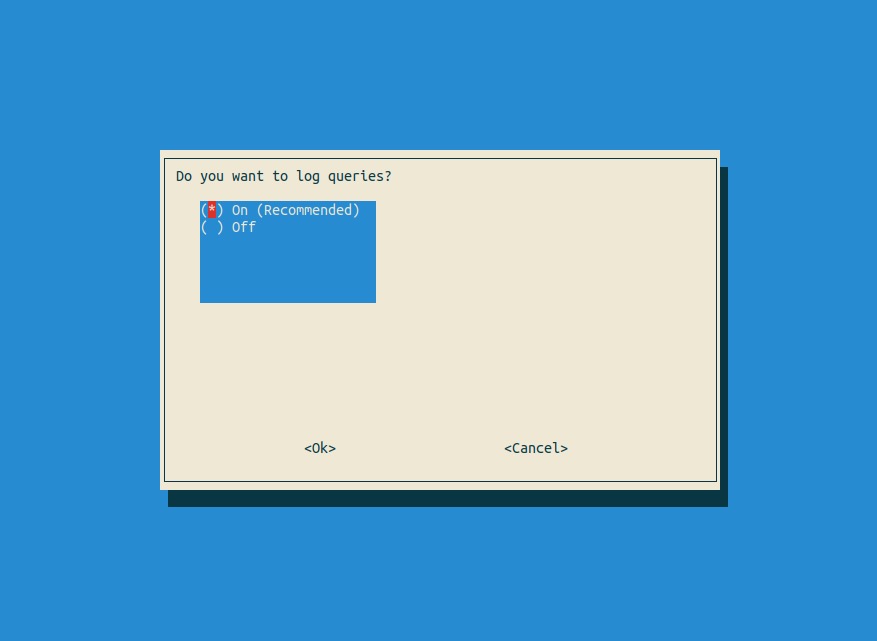
Logging DNS queries is recommended
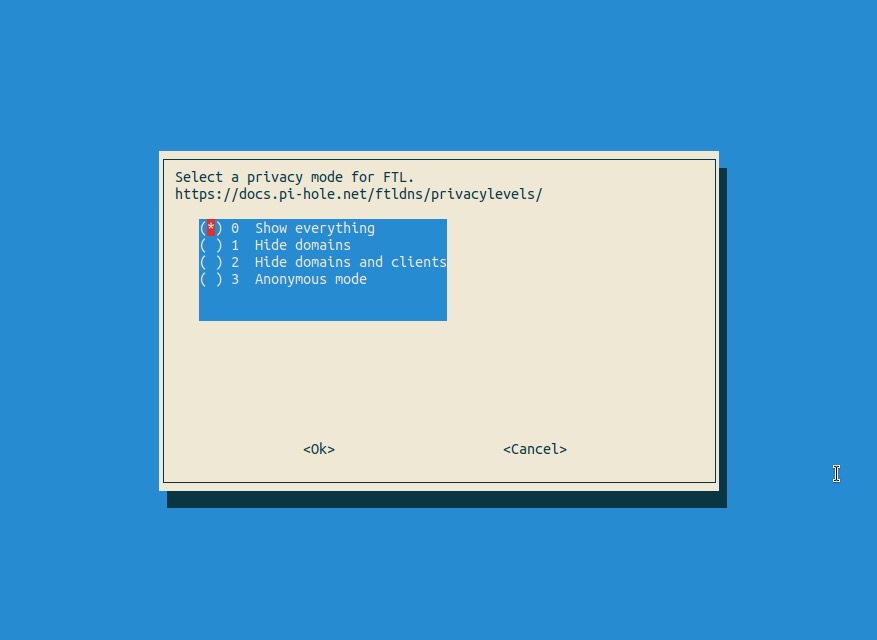
Select 0 - Show Everything for the privacy mode (unless you are concerned about others accessing your Pi-hole logs)
Watch the magic!
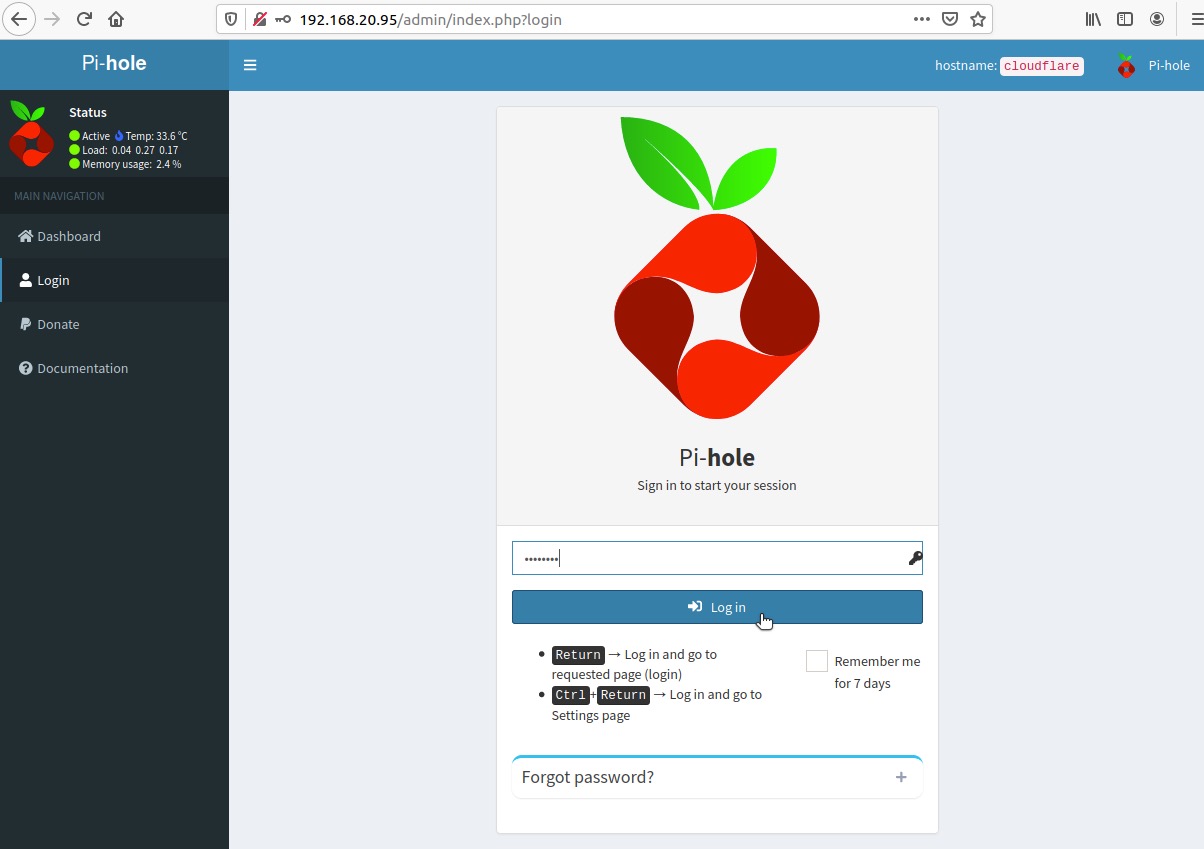
Make note of the randomly generated admin password for the web interface
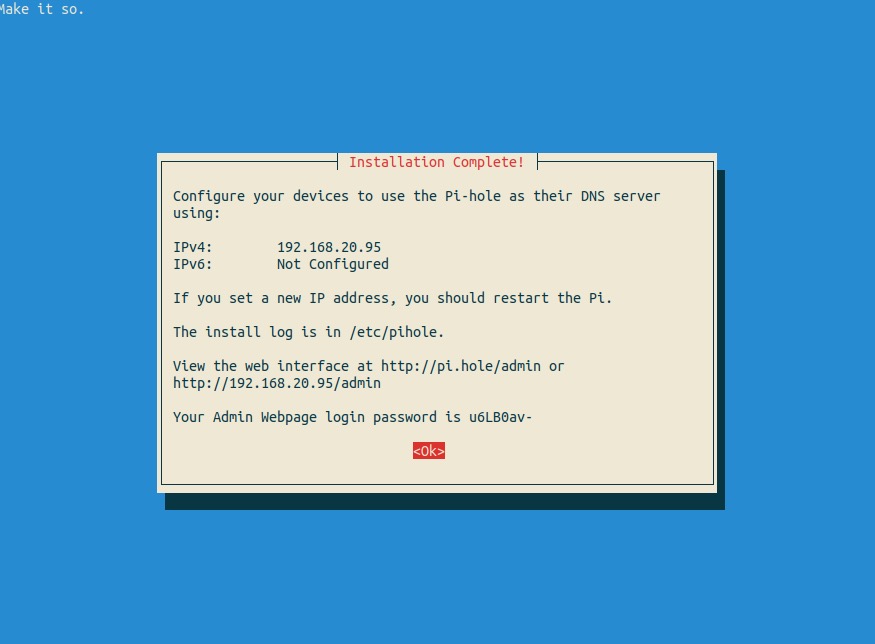
Open a browser on your computer and connect to the Pi-hole admin interface via http://192.168.10.10/admin (where 192.168.10.10 is the static IP address of your Pi-hole server)
Supply the admin password from the final stage of the installation wizard
Ding! Fries are done!
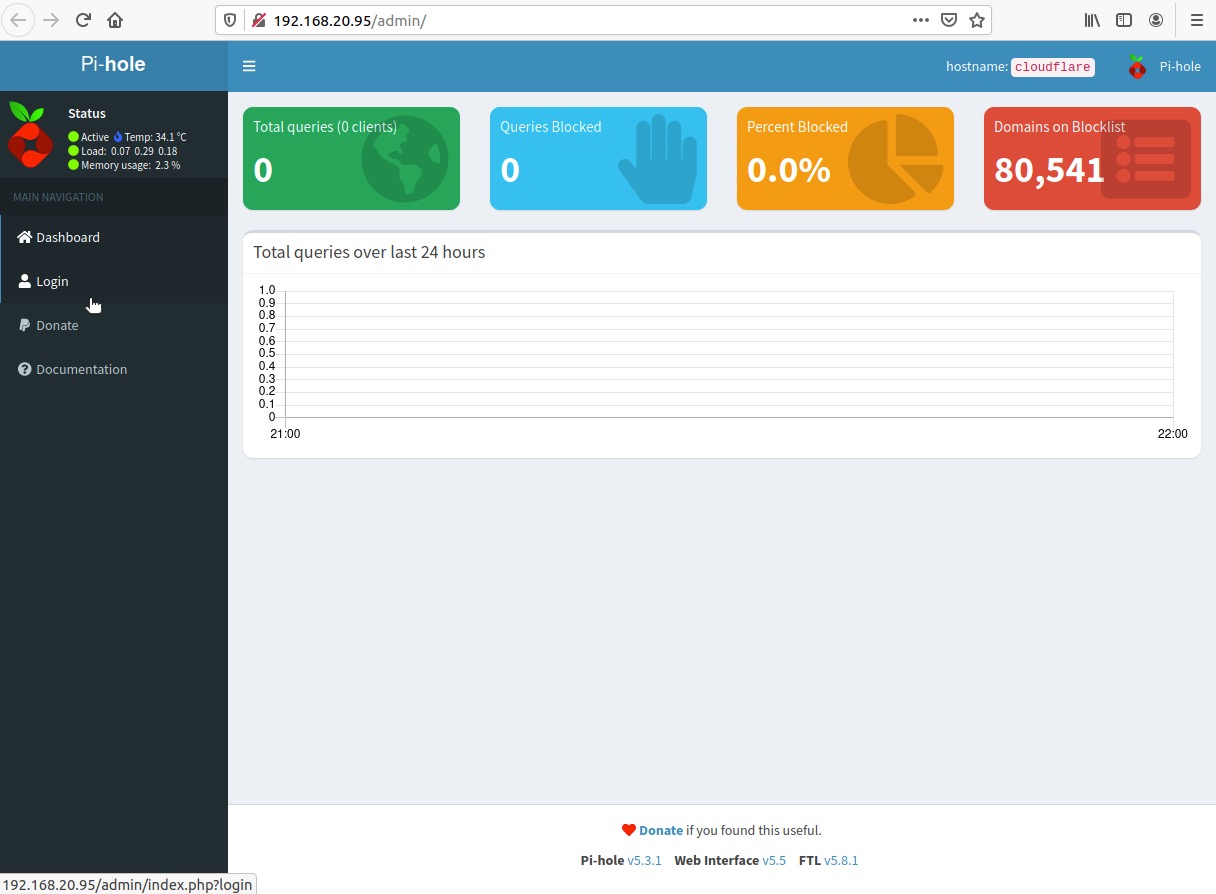
Easy peasy lemon squeezy!
Pi-hole Post-Installation: DHCP Assigned Nameservers
NOTE: Your Internet router is most likely the DHCP server that is responsible for assigning IP addresses, as well as DNS server IP address(es) to devices on your home network. You will need to reconfigure the DHCP server settings to assign the IP address of your Pi-hole server as the DNS nameserver, otherwise devices on your home network will continue to send DNS traffic to your ISP’s nameservers.
Some ISPs do not allow you to reconfigure the DNS nameserver IP addresses. If you find this is the case, you can disable the DHCP server on your router and use Pi-hole as your DHCP server in addition to being your DNS server!
Please refer to the following for details:
Pi-hole Docs: Making your network take advantage of Pi-hole
Pi-hole FAQ: How do I use Pi-hole’s built in DHCP server (and why would I want to)?
Pi-hole FAQ: How do I configure my devices to use Pi-hole as their DNS server?
https://discourse.pi-hole.net/t/how-do-i-configure-my-devices-to-use-pi-hole-as-their-dns-server/245
Pi-hole Post-Installation: Admin Password Reset
In the event you forget to make note of the Pi-hole admin password during the exercise, you can always generate a new password from the command-line:
sudo pihole -a -p
Cloudflare Tunnel
Cloudflare Tunnel (formerly known as Argo Tunnel) is a lightweight daemon (cloudflared) that provides a multi-facted mechanism for delivering and consuming services within the Cloudflare edge network.
The daemon establishes outbound connections (tunnels) between your network infrastructure and the Cloudflare edge network (HTTPS port 7844/tcp). Under the covers, it’s based on Wireguard and runs within kernel space, so it’s incredibly fast and efficient.
We will use Cloudflare Tunnel as a DNS Proxy for upstream DNS requests from Pi-hole to the DNS-over-HTTPS service provided by Cloudflare Gateway. This ensures that all DNS requests from Pi-hole to Cloudflare Gateway are encrypted.
There aresome extra reading materials at the end of the lab exercise - there’s some really great information on Cloudflare Tunnel on our blog!
Install and Configure Cloudflare Tunnel
To install cloudflared on your Raspberry Pi, follow the steps below:
  wget -q https://github.com/cloudflare/cloudflared/releases/latest/download/cloudflared-linux-arm
  sudo cp ./cloudflared-linux-arm /usr/local/bin/cloudflared
  sudo chmod +x /usr/local/bin/cloudflared
  cloudflared -v
To run cloudflared in DNS Proxy mode, the syntax is as follows:
cloudflared proxy-dns --port xxxx --upstream https://your_doh_resolver
By default, cloudflared will listen on port 53/udp which will conflict with Pi-hole’s DNS resolver.
To ensure there is no contention for the DNS port 53/udp, we will be using port 5054/udp, Recursive lookups from Pi-hole to cloudflared will be performed over 5054/udp, then cloudflared will proxy upstream requests via DNS over HTTPS to the nameservers denoted in the Location object within Cloudflare Gateway.
To view the DNS proxy options available with cloudflared, issue the following command:
  cloudflared proxy-dns --help


  NAME:
     cloudflared proxy-dns - Run a DNS over HTTPS proxy server.

  USAGE:
     cloudflared proxy-dns [command options]

  OPTIONS:
     --metrics value             Listen address for metrics reporting. (default: "localhost:") [$TUNNEL_METRICS]
     --address value             Listen address for the DNS over HTTPS proxy server. (default: "localhost") [$TUNNEL_DNS_ADDRESS]
     --port value                Listen on given port for the DNS over HTTPS proxy server. (default: 53) [$TUNNEL_DNS_PORT]
     --upstream value            Upstream endpoint URL, you can specify multiple endpoints for redundancy. (default: "https://1.1.1.1/dns-query", "https://1.0.0.1/dns-query")                                                                                                     (accepts multiple inputs) [$TUNNEL_DNS_UPSTREAM]
     --bootstrap value           bootstrap endpoint URL, you can specify multiple endpoints for redundancy. (default: "https://162.159.36.1/dns-query", "https://162.159.46.1/dns-query", "https://[2606:4700:4700::1111]/dns-query", "https://[2606:4700:4700::1001]/dns-query")  (accepts multiple inputs) [$TUNNEL_DNS_BOOTSTRAP]
     --max-upstream-conns value  Maximum concurrent connections to upstream. Setting to 0 means unlimited. (default: 5) [$TUNNEL_DNS_MAX_UPSTREAM_CONNS]
     --help, -h                  show help (default: false)
To run cloudflared in DNS proxy mode, use the folloing syntax:
cloudflared proxy-dns --port 5054 --upstream https://xxx.cloudflare-gateway.com/dns-query
Make sure to replace the upstream DoH resolver with the DNS-over-HTTPS address in your gateway configuration!
NOTE: When running cloudflared from the command-line as demonstrated above, it may appear to hang. This is expected behavior as cloudflared is intended to run in the background as a service. Simply press CTRL+C to kill the process and proceed to creating the configuration file and installing cloudflared as a service.
Let’s create the configuration file for cloudflared
  sudo mkdir /etc/cloudflared
  Create a configuration file (config.yml):
  sudo nano /etc/cloudflared/config.yml
Add the following lines to /etc/cloudflared/config.yml
  logfile: /var/log/cloudflared.log
  proxy-dns: true
  proxy-dns-port: 5054
  proxy-dns-upstream:
     - https://xxx.cloudflare-gateway.com/dns-query
Next, we’ll install cloudflared as a service so it starts automatically any time you reboot your Raspberry Pi
sudo cloudflared service install --legacy
Enable and start the service
  sudo systemctl enable cloudflared
  sudo systemctl start cloudflared
You can validate the service is running with systemctl
  sudo systemctl status cloudflared


  ● cloudflared.service - Argo Tunnel
     Loaded: loaded (/etc/systemd/system/cloudflared.service; enabled; vendor preset: enabled)
     Active: active (running) since Wed 2021-07-21 02:30:35 EDT; 13h ago
   Main PID: 13195 (cloudflared)
      Tasks: 10 (limit: 4915)
     CGroup: /system.slice/cloudflared.service
             └─13195 /home/jhochberg/cloudflared/cloudflared --config /etc/cloudflared/config.yml --no-autoupdate --origin
You can use netstat to ensure the DNS proxy listener is active
  netstat -an | grep 5054

  tcp        0      0 127.0.0.1:5054          0.0.0.0:*               LISTEN
  udp        0      0 127.0.0.1:5054          0.0.0.0:*
You can also confirm the upstream is working by querying localhost on port 5054
  dig www.cloudflare.com -p 5054 @127.0.0.1


  ; <<>> DiG 9.11.5-P4-5.1+deb10u5-Raspbian <<>> www.cloudflare.com -p 5054 @127.0.0.1
  ;; global options: +cmd
  ;; Got answer:
  ;; ->>HEADER<<- opcode: QUERY, status: NOERROR, id: 55625
  ;; flags: qr rd ra ad; QUERY: 1, ANSWER: 2, AUTHORITY: 0, ADDITIONAL: 1

  ;; OPT PSEUDOSECTION:
  ; EDNS: version: 0, flags:; udp: 4096
  ;; QUESTION SECTION:
  ;www.cloudflare.com.		IN	A

  ;; ANSWER SECTION:
  www.cloudflare.com.	130	IN	A	104.16.123.96
  www.cloudflare.com.	130	IN	A	104.16.124.96

  ;; Query time: 18 msec
  ;; SERVER: 127.0.0.1#5054(127.0.0.1)
  ;; WHEN: Wed Jul 21 15:40:48 EDT 2021
  ;; MSG SIZE  rcvd: 115
Pi-hole - Upstream DNS Resolution via Cloudflare Tunnel
In this section, we will configure Pi-hole to forward recursive DNS lookups to Cloudflare Gateway via Cloudflare Tunnel running in DNS Proxy mode.
Configure Pi-hole to Send Upstream DNS Requests via Cloudflare Tunnel
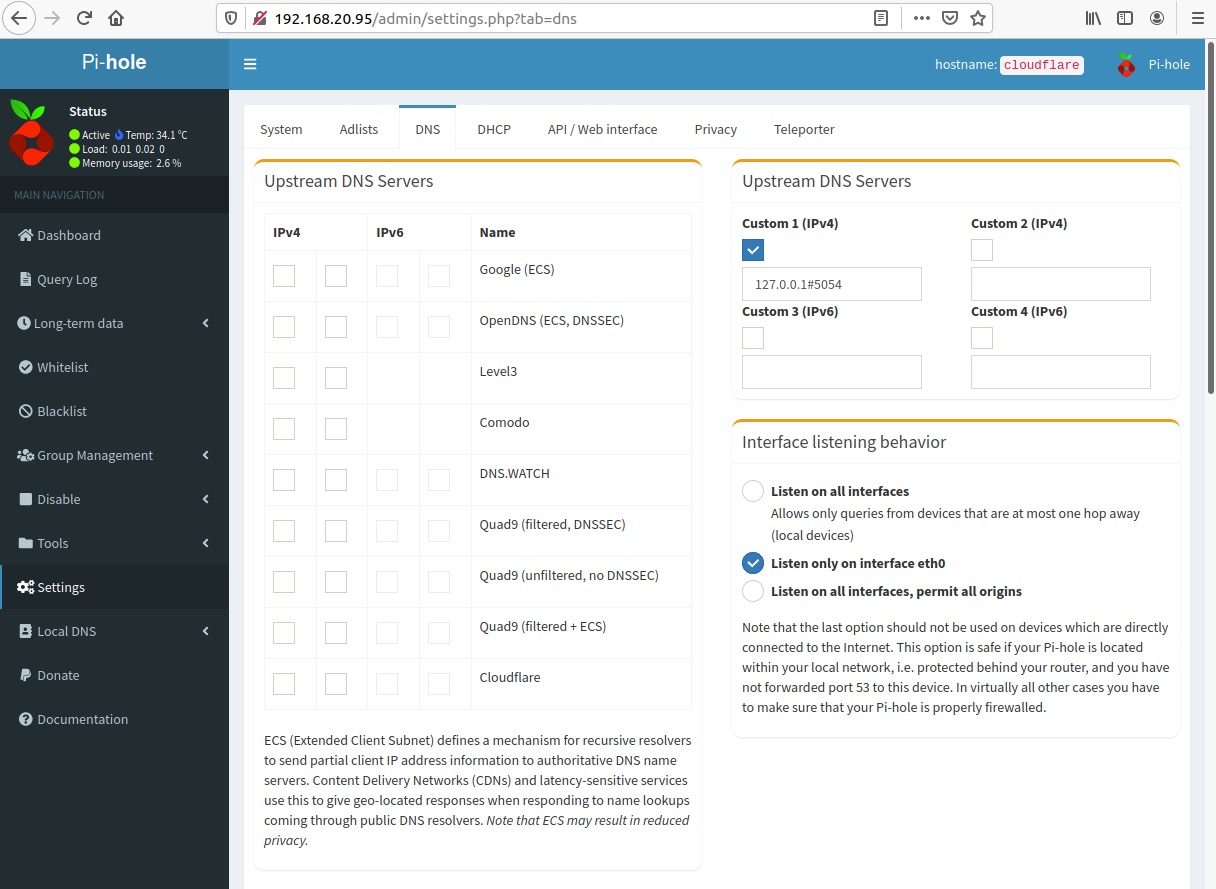
Log into the Pi-hole Admin Console and select Settings
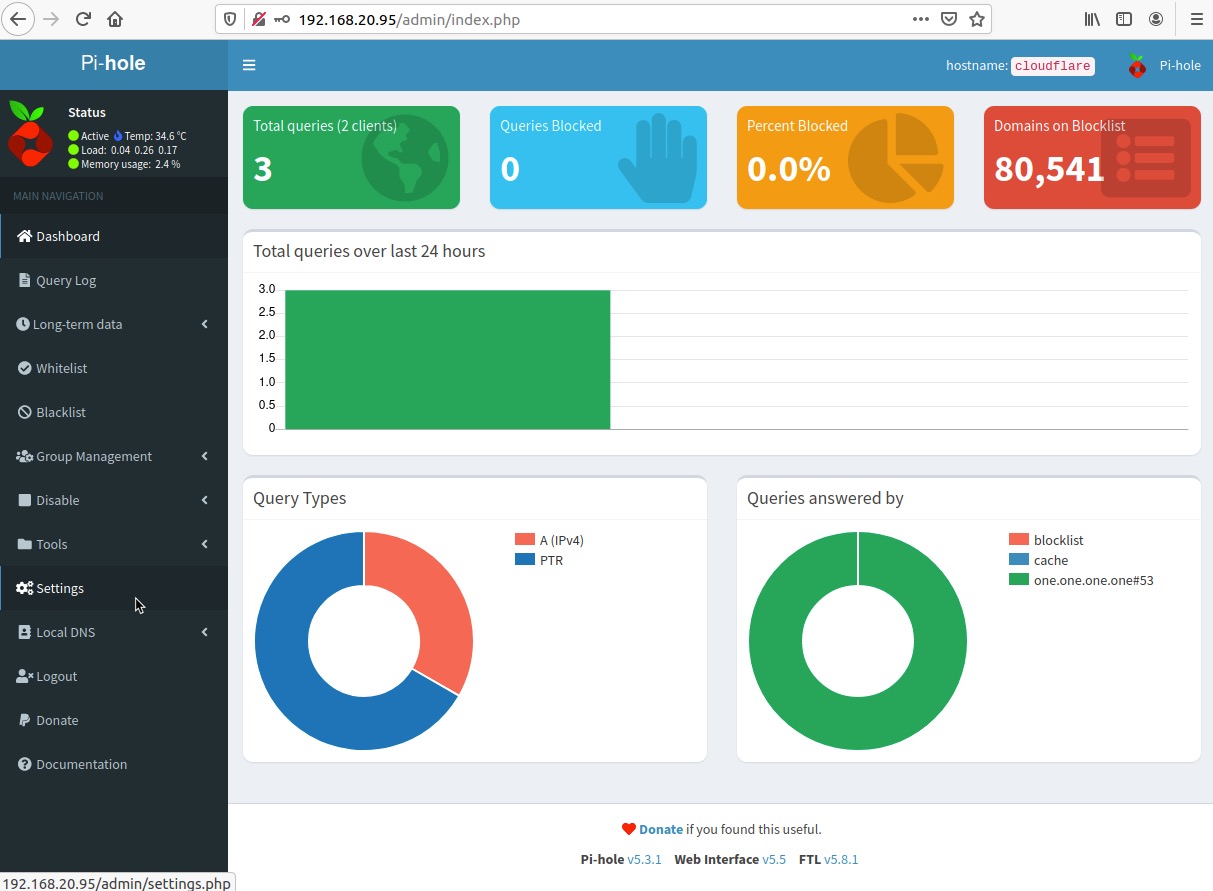
Navigate to the DNS tab
Deselect the checkboxes in the IPv4 and/or IPv6 checkboxes under the Upstream DNS Servers column
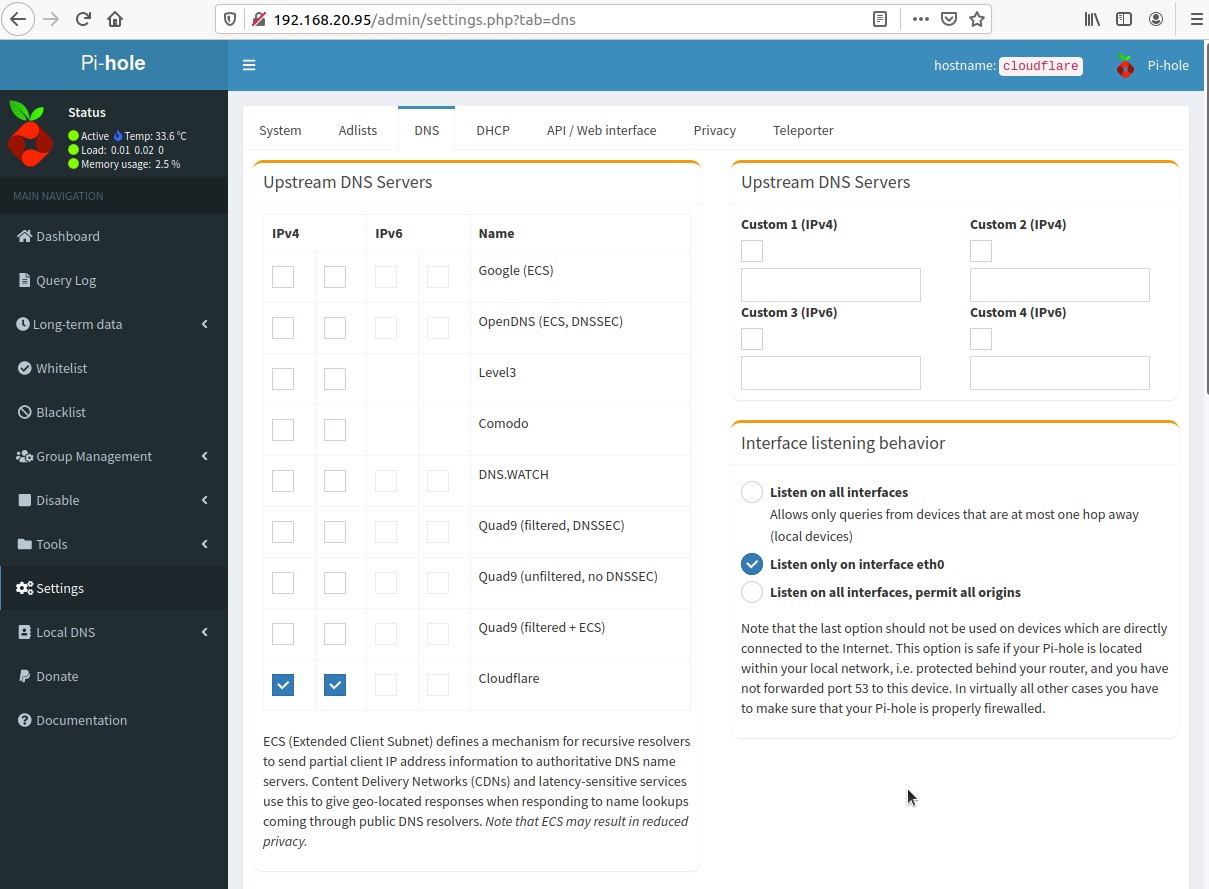
Select the checkbox below to Custom 1 (IPv4) and enter 127.0.0.1#5054
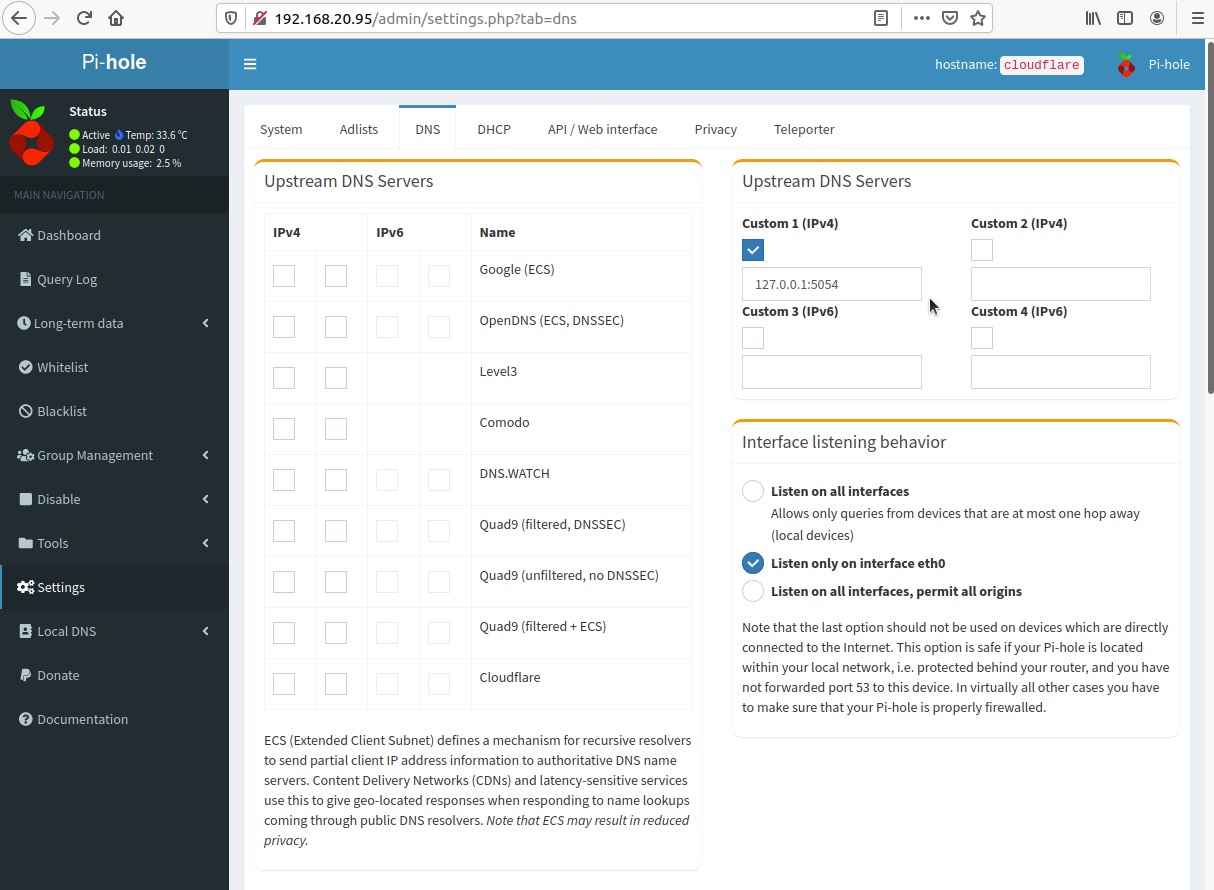
Scroll down and click Save
If you see an error message like this, it is most likely due to not using the correct syntax when specifying the non-standard port for DNS (5054/udp)
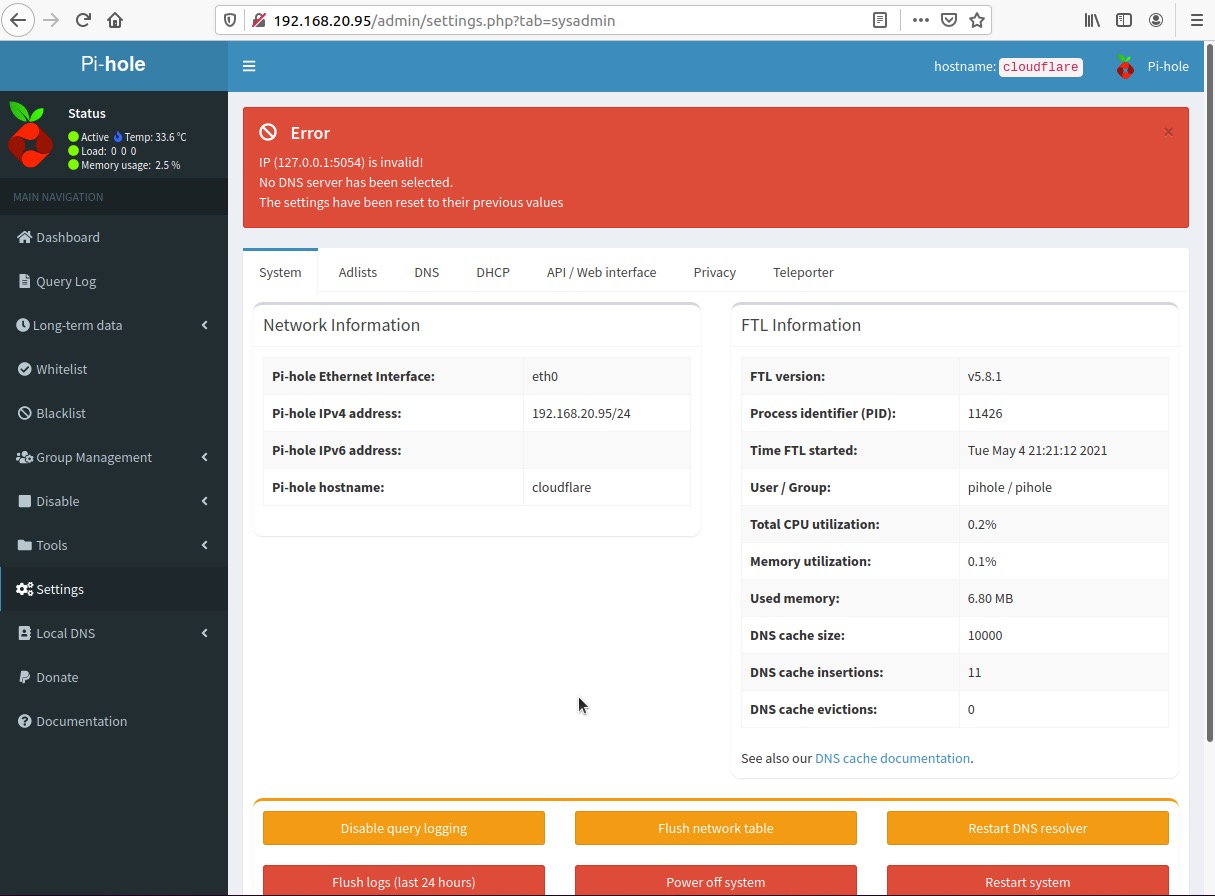
NOTE: Pi-hole requires the use of the # symbol between the loopback IP address and port number - we usually see the use of a colon (:), so it is not unusual to input a colon instead of a hash (#)
If you received the error message, verify the syntax is correct and click Save
Cloudflare Gateway: DNS Policy Overview
Cloudflare Gateway provides the ability to filter, isolate, and inspect Internet-bound traffic to protect users from malware, phishing, and prevent sensitive data from leaving your network.
Cloudflare Gateway provides powerful location and identity-aware access controls enforced via DNS, HTTP, and Network-layer policies.
This lab exercise leverages Pi-hole to perform recursive DNS lookups via DNS-over-HTTPS to upstream nameservers on the Cloudflare edge network. The Cloudflare Gateway nameservers inspect inbound DNS requests and apply DNS Policies as configured by the administrator.
Keep in mind that you can deploy Cloudflare Gateway in a similar fashion by configuring your corporate DNS nameservers to forward DNS requests to Cloudflare Gateway nameservers.
NOTE: If you want to skip to the lab exercise, simply advance to the next section.
When creating a DNS policy, you can select as many security risk categories and content categories as needed to fully secure your network.
Bulding a DNS Policy involves the creation of rules based on the following elements:
Actions
Expressions
Selectors
Operators
Lions, and tigers, and bears…oh my! :-)
Actions
Actions in DNS policies allow you to choose what to do with a given set of elements.
You can assign one action per policy.
These are the action types you can choose from:
Allow
Block
Override
SafeSearch
YouTube Restricted Mode
Allow
Policies with Allow actions allow DNS queries you specify within the Selectors and Value fields.
Block
Policies with Block actions block DNS queries you specify within the Selectors and Value fields.
Custom Block Page
When choosing the Block action, toggle the Display custom block page setting to respond to queries with a block page, and to specify the message you want to display to users who navigate to blocked websites. If disabled, Gateway will respond to blocked queries with 0.0.0.0.
Override
Policies with Override actions allow you to respond to all DNS queries for a given domain to another destination.
SafeSearch
SafeSearch is a feature of search engines that can help you filter explicit or offensive content. When you enable SafeSearch, the search engine filters explicit or offensive content and returns search results that are safe for children, you or at work.
You can use Cloudflare Gateway to enable SafeSearch on search engines like Google, Bing, Yandex, YouTube and DuckDuckGo.
YouTube Restricted Mode
Similar to SafeSearch, you can enforce YouTube Restricted mode by choosing the Youtube Restricted Mode action. YouTube Restricted Mode is an automated filter for adult and offensive content that’s built into YouTube.
Expressions
Expressions are used to determine the set of elements you want to impact with your policy.
To build an expression, you need to choose a Selector and an Operator, and enter a value or range of values in the Value field.
Selectors
Selectors are effectively the matching criteria used when evaluating policy.
The following is a list of available matching criteria:
DNS Content Categories
DNS DoH Subdomain
DNS Domain
DNS Host
DNS Query RType
DNS Resolver IP
DNS Security Categories
DNS Src (Source) IP
Location
User Email **
User Group Emails **
User Group IDs **
User Group Names **
User Name **
NOTE: ** Any of the Selectors that are based on identity require the Cloudflare WARP client. These are outside the scope of this lab exercise but welcome you to experiment with them as time permits.
Operators
Operators are the way Gateway matches traffic to a Selector.
Operator |
Meaning |
|---|---|
is |
exact match (equals) |
is not |
all except exact match |
in |
in any of defined entries |
not in |
not in defined entries |
matches regex |
regex evaluates to true |
does not match regex |
all except when regex evals to true |
Example Policies
Allow Queries to Education Domains
The following configuration allows DNS queries to domains we categorize as belonging to the Education content category:
Selector |
Operator |
Value |
Action |
|---|---|---|---|
Content Categories |
in |
Education |
Allow |
Block Adult Themed Domains
The following configuration blocks DNS queries to domains we categorize as belonging to the Adult Themes content category:
Selector |
Operator |
Value |
Action |
|---|---|---|---|
Content Categories |
in |
Adult Themes |
Block |
Blocking a Subdomain
To block a domain and all subdomains, you can create the following policy:
Selector |
Operator |
Value |
Action |
|---|---|---|---|
Domain |
is |
example.com |
Block |
Provide Custom Response IP or Hostname for Specific DNS Queries
Selector |
Operator |
Value |
Action |
Override Hostname |
|---|---|---|---|---|
Host |
is |
www.example.com |
Override |
1.2.3.4 -or- www.alternate.com |
Blocking a Top-Level Domain (TLD)
Selector |
Operator |
Value |
Action |
|---|---|---|---|
Domain |
Matches Regex |
[.]net |
Block |
Probably not the best example as blocking a popular TLD like .com or .net will prevent users from connecting to significant portions of the Internet.
SafeSearch Example
Selector |
Operator |
Value |
Action |
|---|---|---|---|
Domain |
is |
google.com |
SafeSearch |
Test SafeSearch
You can test if SafeSearch is working by performing dig on the search engines. Instead of returning the regular IP address, you should see the CNAMEs returned like below:
Google:
dig www.google.com
The response for www.google.com should look like this:
  ; <<>> DiG 9.10.6 <<>> www.google.com
  ;; global options: +cmd
  ;; Got answer:
  ;; ->>HEADER<<- opcode: QUERY, status: NOERROR, id: 16041
  ;; flags: qr rd ra; QUERY: 1, ANSWER: 6, AUTHORITY: 0, ADDITIONAL: 1

  ;; OPT PSEUDOSECTION:
  ; EDNS: version: 0, flags:; udp: 1232
  ;; QUESTION SECTION:
  ;www.google.com.			IN	A

  ;; ANSWER SECTION:
  www.google.com.		            185	IN	CNAME	forcesafesearch.google.com
  forcesafesearch.google.com.		185	IN	A	    216.239.38.120


  ;; Query time: 67 msec
  ;; SERVER: 192.0.2.2#53(192.0.2.2)
  ;; WHEN: Mon Jul 19 17:55:07 EDT 2021
  ;; MSG SIZE  rcvd: 139
YouTube
dig www.youtube.com
The response for www.youtube.com should look like this:
  ; <<>> DiG 9.10.6 <<>> www.youtube.com
  ;; global options: +cmd
  ;; Got answer:
  ;; ->>HEADER<<- opcode: QUERY, status: NOERROR, id: 33753
  ;; flags: qr rd ra; QUERY: 1, ANSWER: 17, AUTHORITY: 0, ADDITIONAL: 1

  ;; OPT PSEUDOSECTION:
  ; EDNS: version: 0, flags:; udp: 1232
  ;; QUESTION SECTION:
  ;www.youtube.com.		IN	A
  ;; ANSWER SECTION:
  www.youtube.com.    	86266	IN	CNAME	restrict.youtube.com.
  restrict.youtube.com.   166	IN	A	    216.239.38.120


  ;; Query time: 78 msec
  ;; SERVER: 192.0.2.2#53(192.0.2.2)
  ;; WHEN: Mon Jul 19 18:00:24 EDT 2021
  ;; MSG SIZE  rcvd: 334
Bing
Bing will return strict.bing.com.
dig www.bing.com
The response for www.bing.com should look like this:
  ; <<>> DiG 9.10.6 <<>> www.bing.com
  ;; global options: +cmd
  ;; Got answer:
  ;; ->>HEADER<<- opcode: QUERY, status: NOERROR, id: 33753
  ;; flags: qr rd ra; QUERY: 1, ANSWER: 17, AUTHORITY: 0, ADDITIONAL: 1

  ;; OPT PSEUDOSECTION:
  ; EDNS: version: 0, flags:; udp: 1232
  ;; QUESTION SECTION:
  ;www.bing.com.		IN	A
  ;; ANSWER SECTION:
  www.bing.com.	          60	    IN	CNAME	strict.bing.com.
  strict.bing.com.        3432	    IN	CNAME	strict.bing.com.a-0017.a-msedge.net.
  a-0017.a-msedge.net     72        IN  A       204.79.197.220


  ;; Query time: 78 msec
  ;; SERVER: 192.0.2.2#53(192.0.2.2)
  ;; WHEN: Mon Jul 19 18:00:24 EDT 2021
  ;; MSG SIZE  rcvd: 334
DuckDuckGo
DuckDuckGo will return safe.duckduckgo.com.
dig www.duckduckgo.com
The response for www.duckduckgo.com should look like this:
  ; <<>> DiG 9.10.6 <<>> www.duckduckgo.com
  ;; global options: +cmd
  ;; Got answer:
  ;; ->>HEADER<<- opcode: QUERY, status: NOERROR, id: 59793
  ;; flags: qr rd ra; QUERY: 1, ANSWER: 2, AUTHORITY: 0, ADDITIONAL: 1

  ;; OPT PSEUDOSECTION:
  ; EDNS: version: 0, flags:; udp: 1232
  ;; QUESTION SECTION:
  ;www.duckduckgo.com.		IN	A

  ;; ANSWER SECTION:
  www.duckduckgo.com.	    86376	IN	CNAME	safe.duckduckgo.com.
  safe.duckduckgo.com.		176	    IN	A	    54.241.17.246

  ;; Query time: 65 msec
  ;; SERVER: 192.0.2.2#53(192.0.2.2)
  ;; WHEN: Mon Jul 19 18:11:22 EDT 2021
  ;; MSG SIZE  rcvd: 77
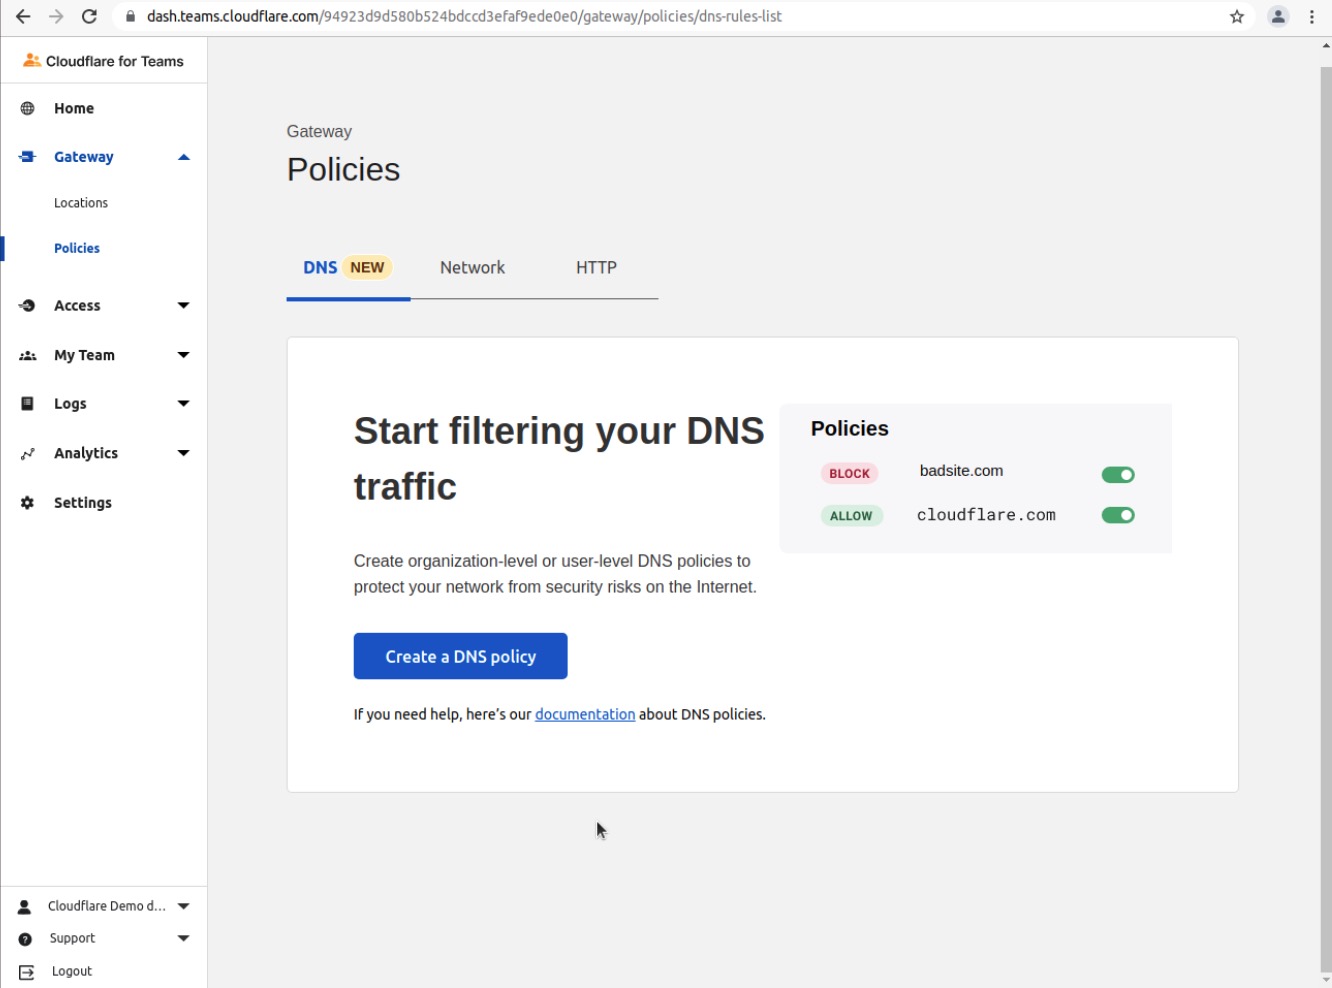
Cloudflare Gateway: Configure DNS Policies
In the final section of this lab, we will configure a DNS Policy in Cloudflare Gateway.
In the last section of the lab exercise, we configure Pi-hole to use the DNS nameservers provided by Cloudflare Gateway for all recursive DNS lookups.
Block Domain Category - Sports
Let’s create a DNS Policy that blocks DNS lookups for sites that are related to sports & recreation.
NOTE: Feel free to experiment and adapt the examples for your own needs!
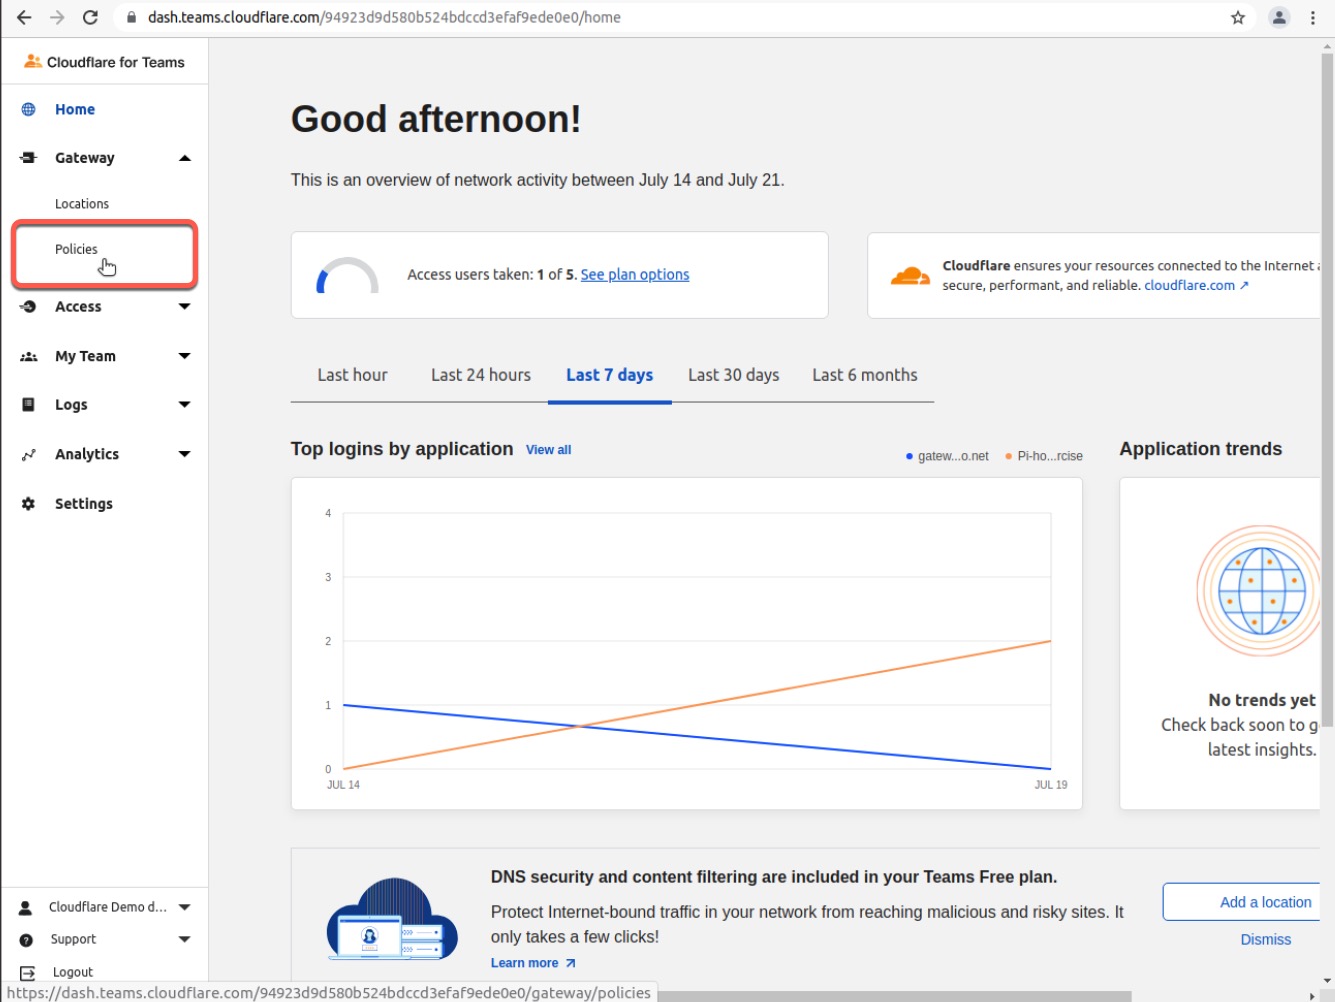
In the Cloudflare for Teams dashboard, navigate to Gateway -> Policies -> DNS
Click Create a Policy
Provide a name (Block Sports Domains) and a description
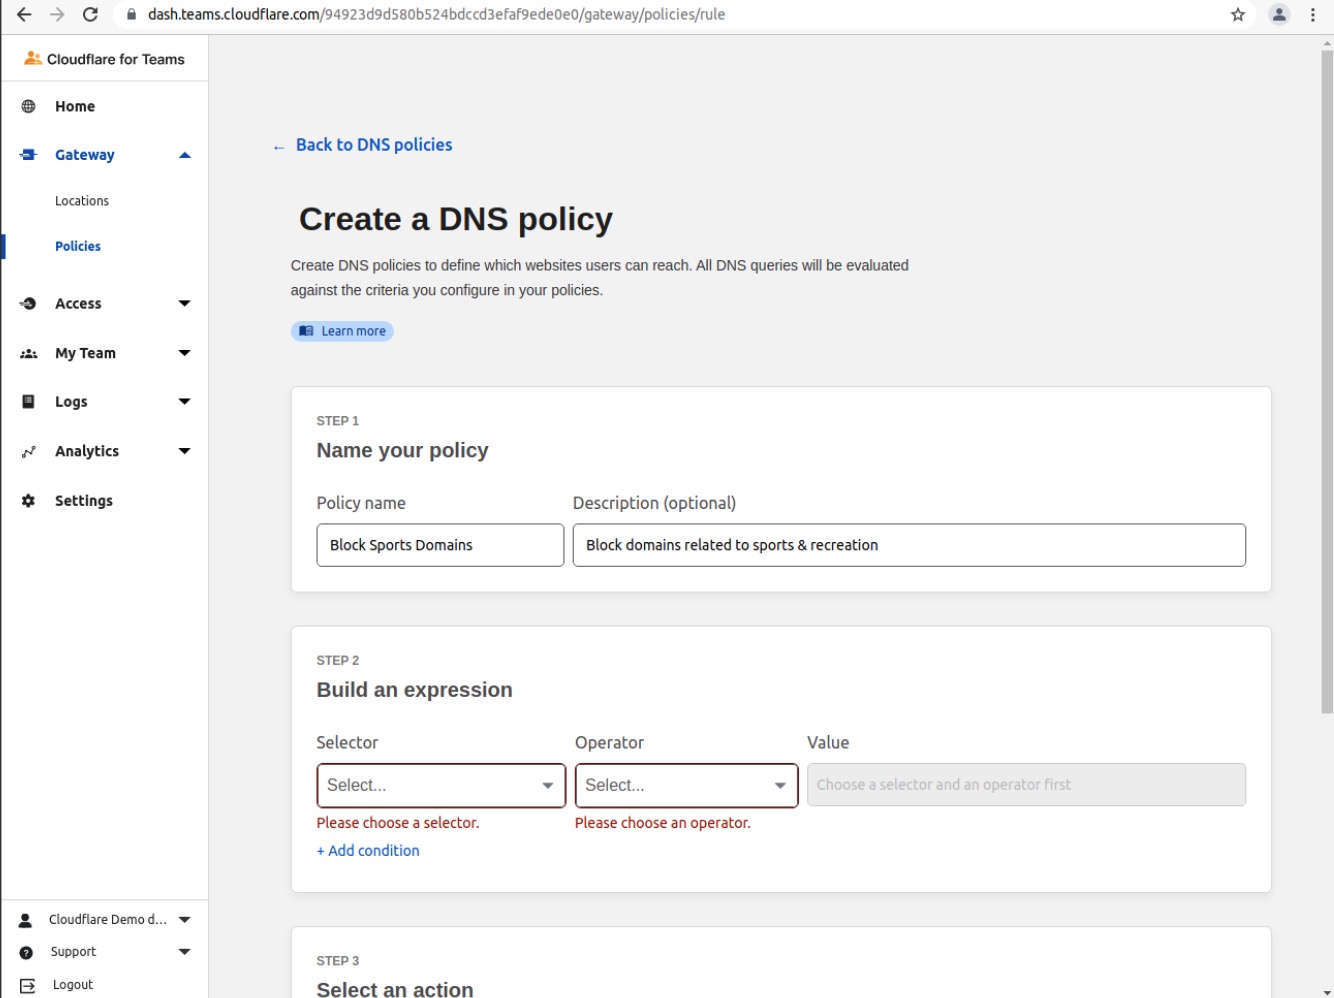
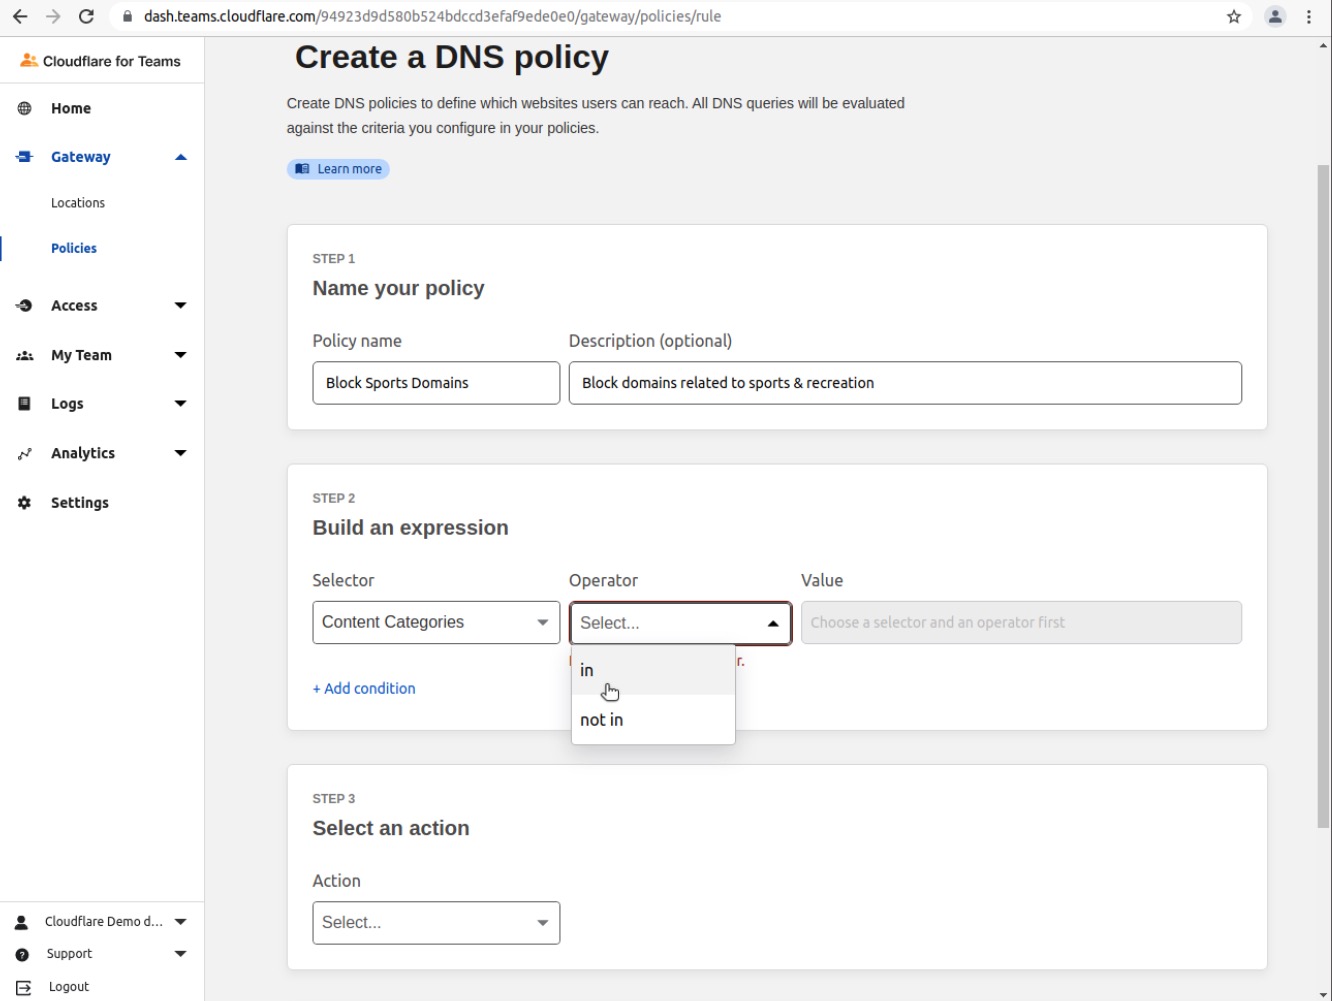
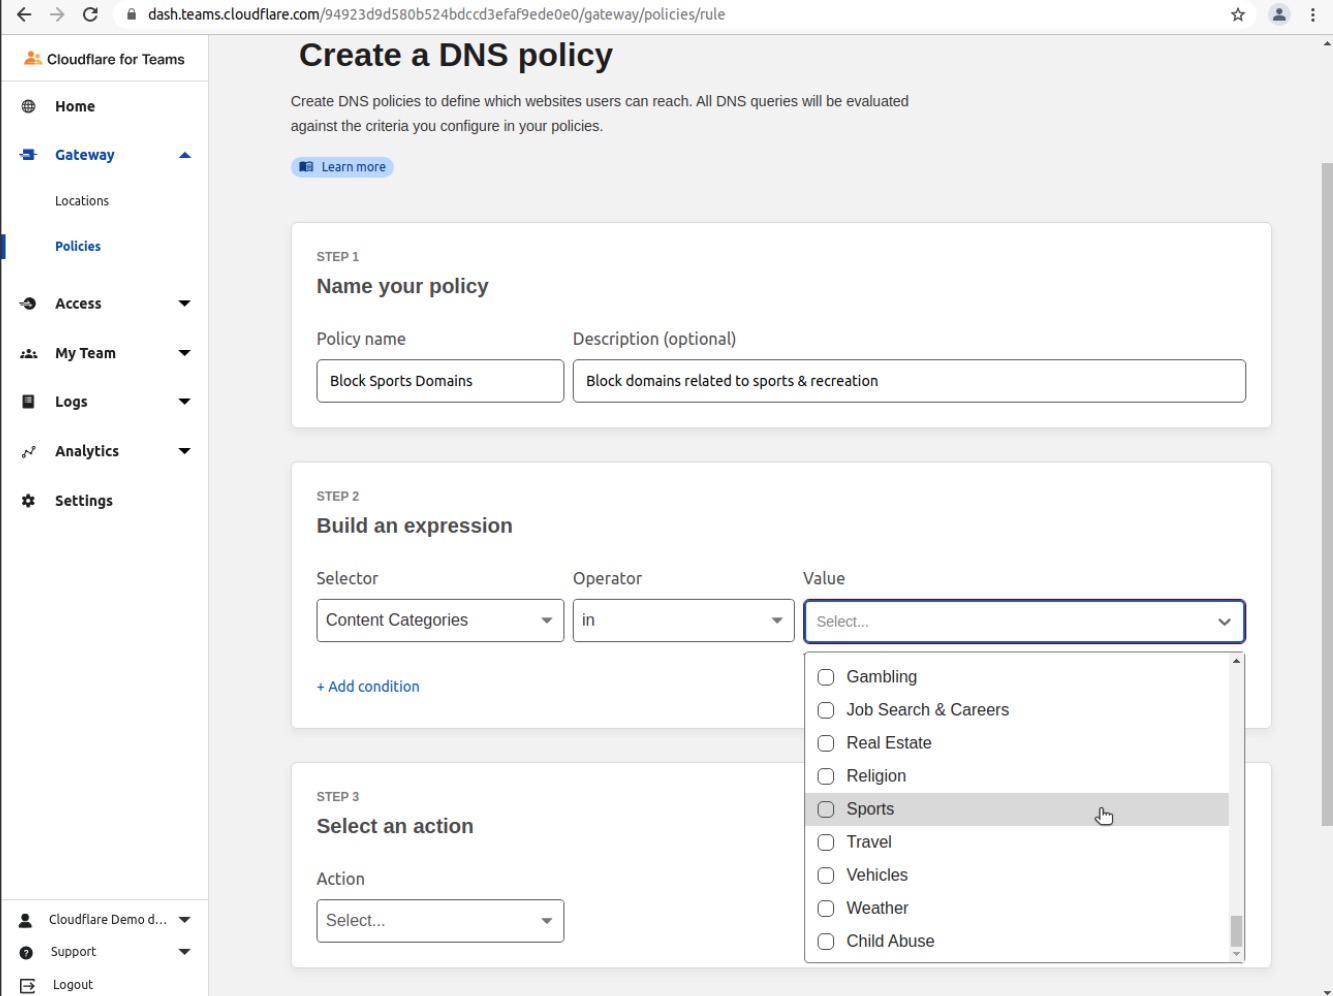
In the Build an Expression section, choose Content Categories in the Selector field
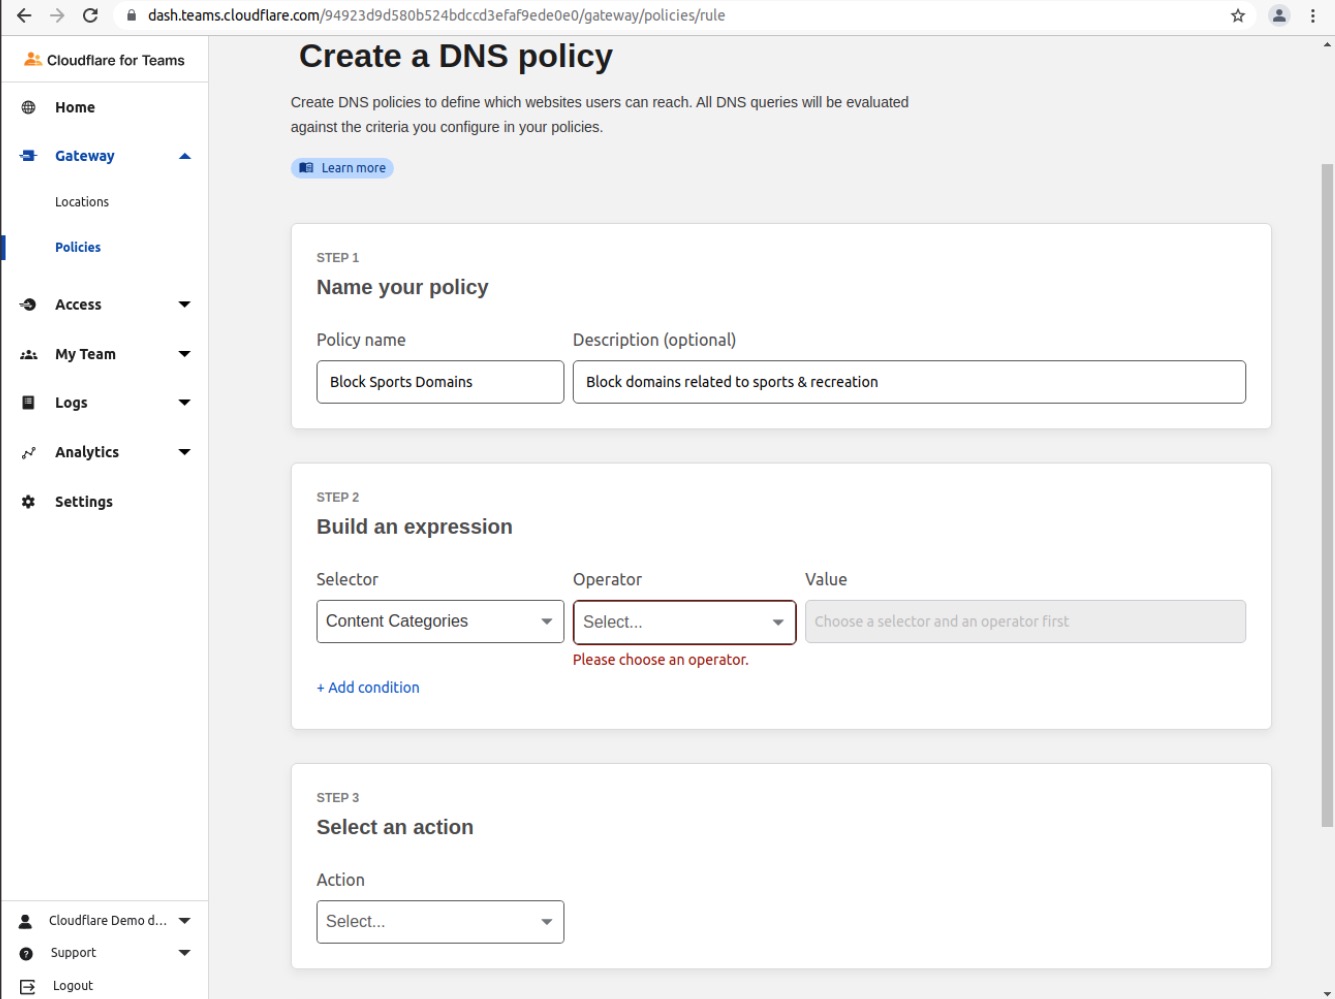
Choose in in the Operator field
Choose Sports in the Value field
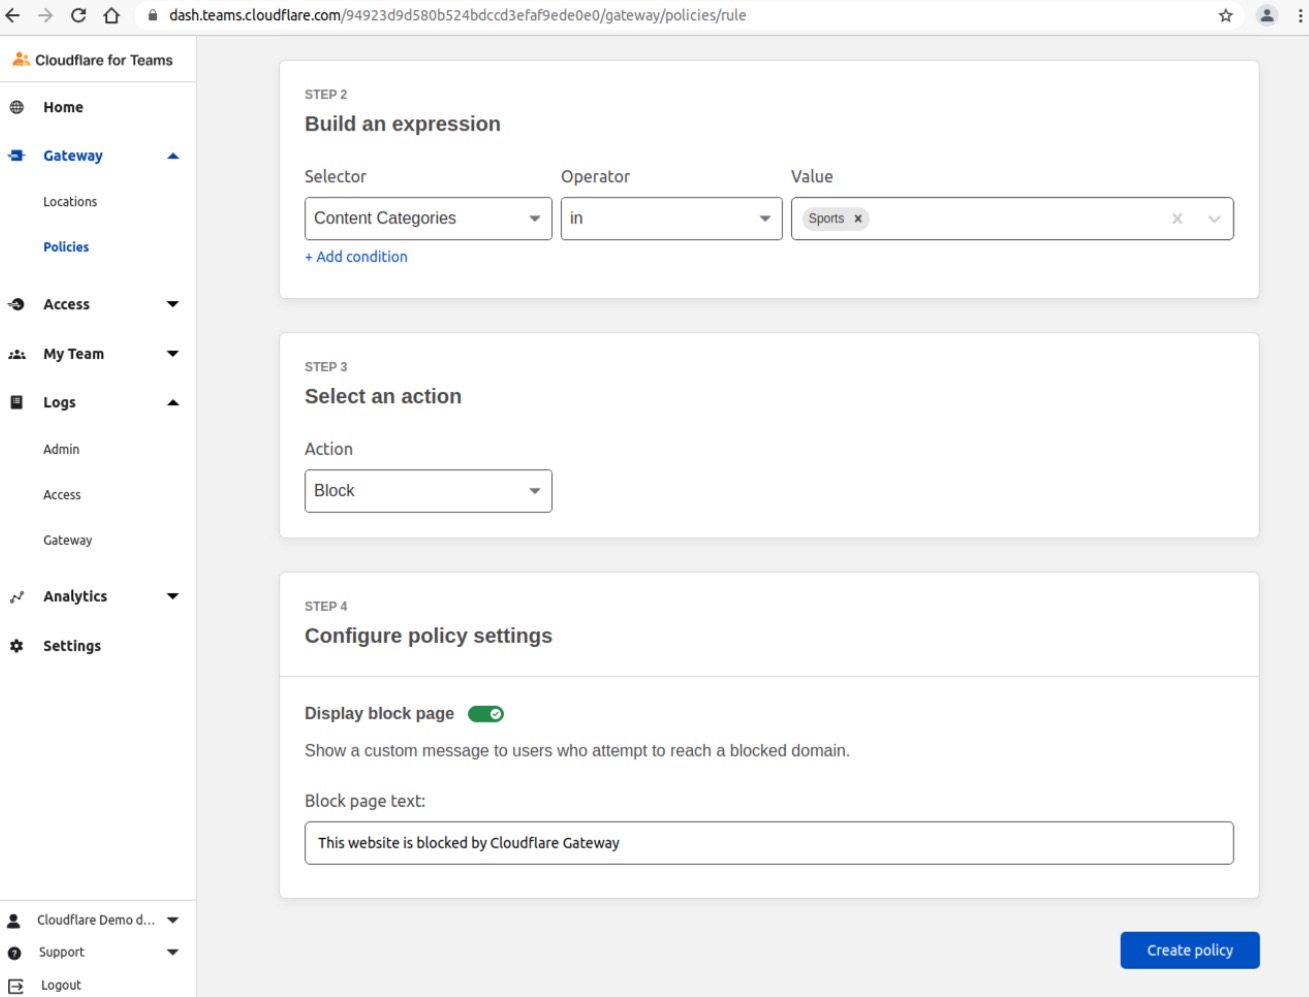
Choose Block in the Select an Action field
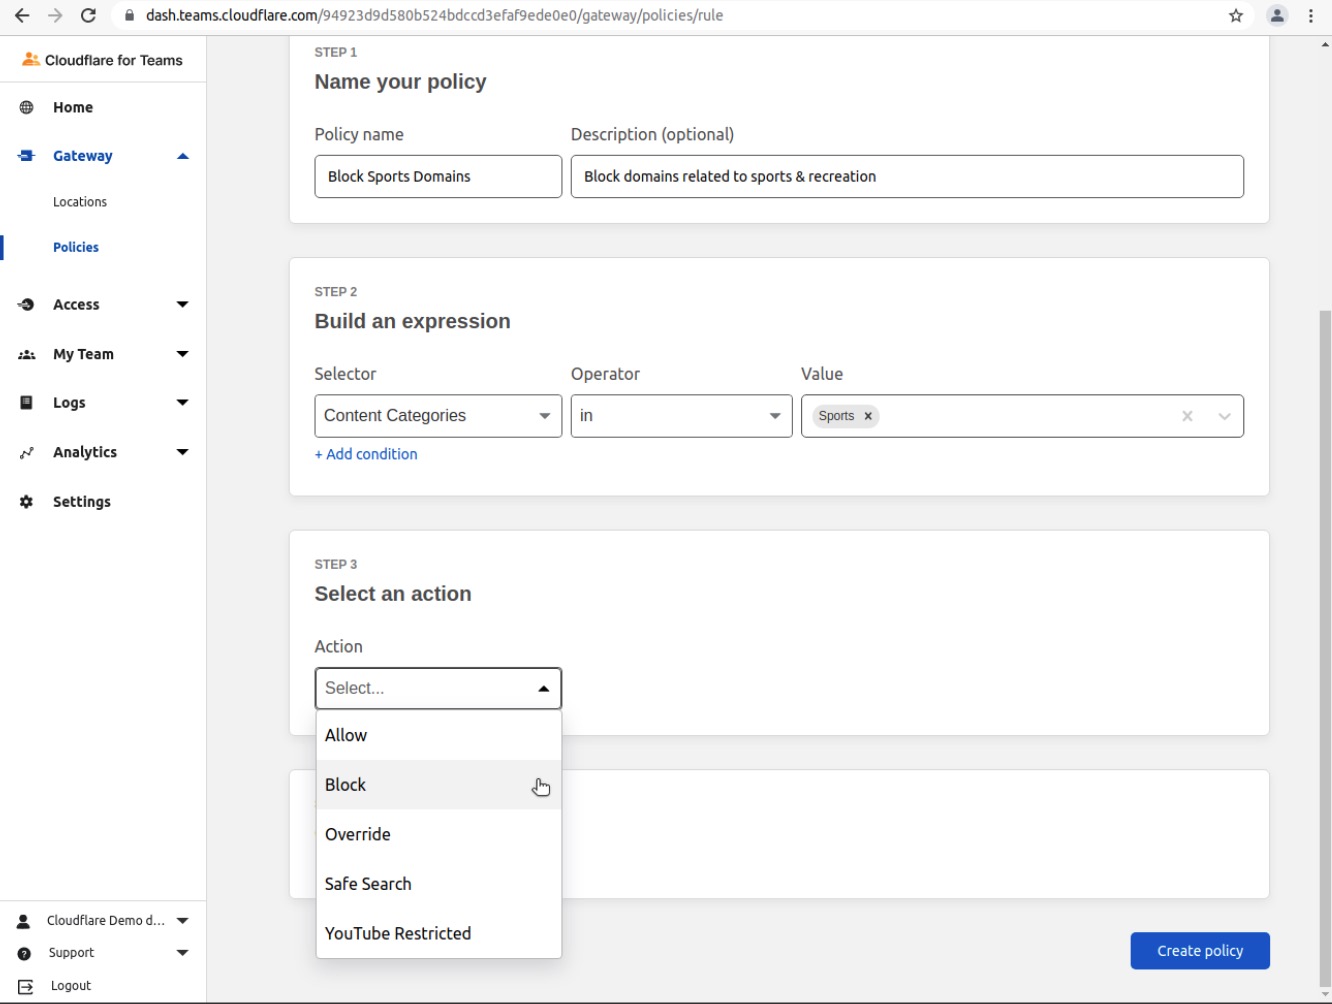
Enable Display Block Page and optionally add a custom message to the Display Block Page Text field
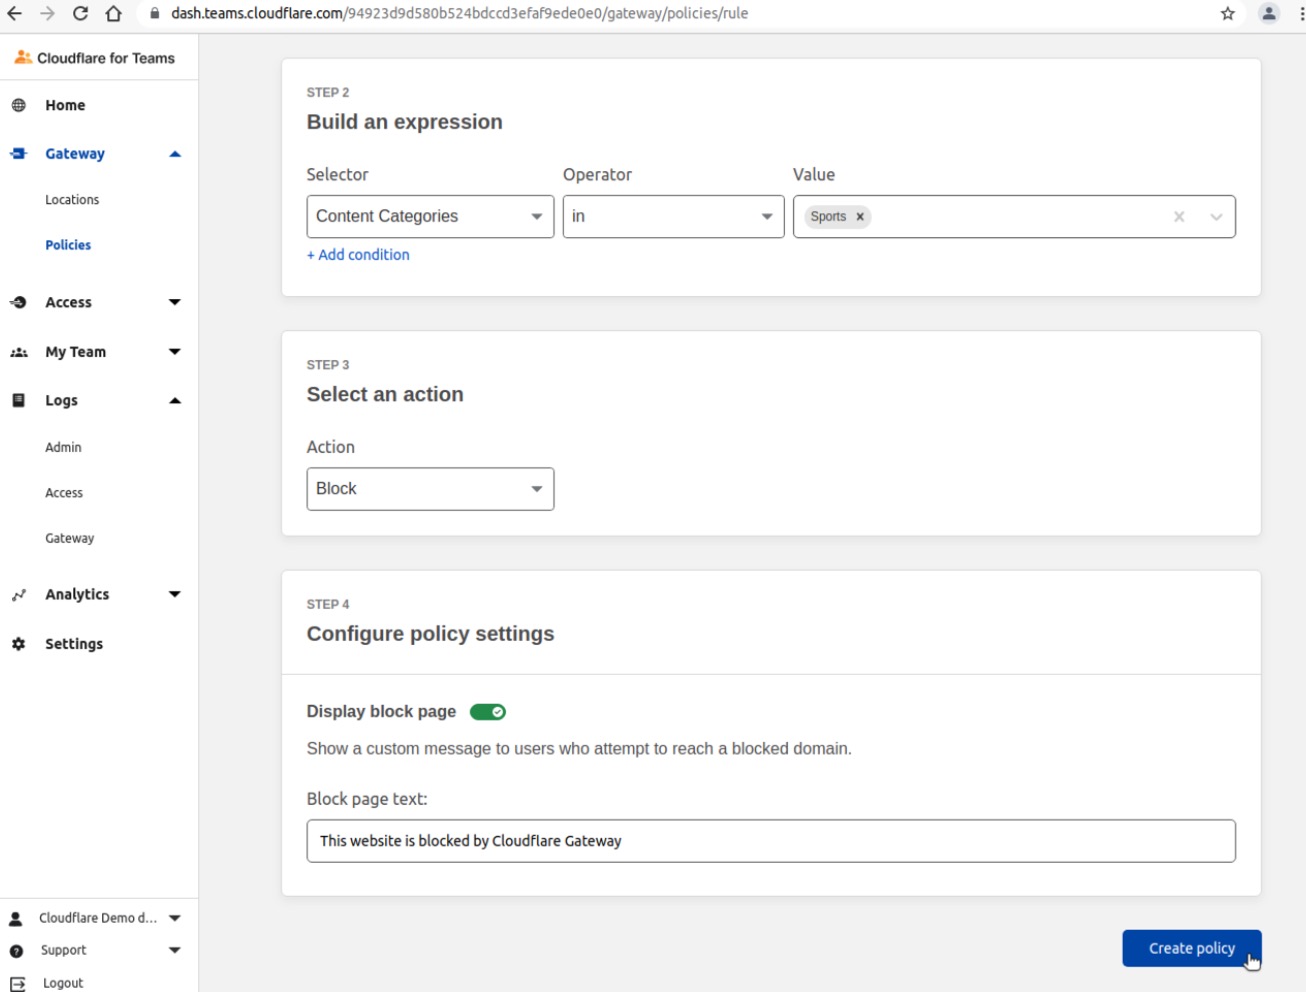
Click Create Policy
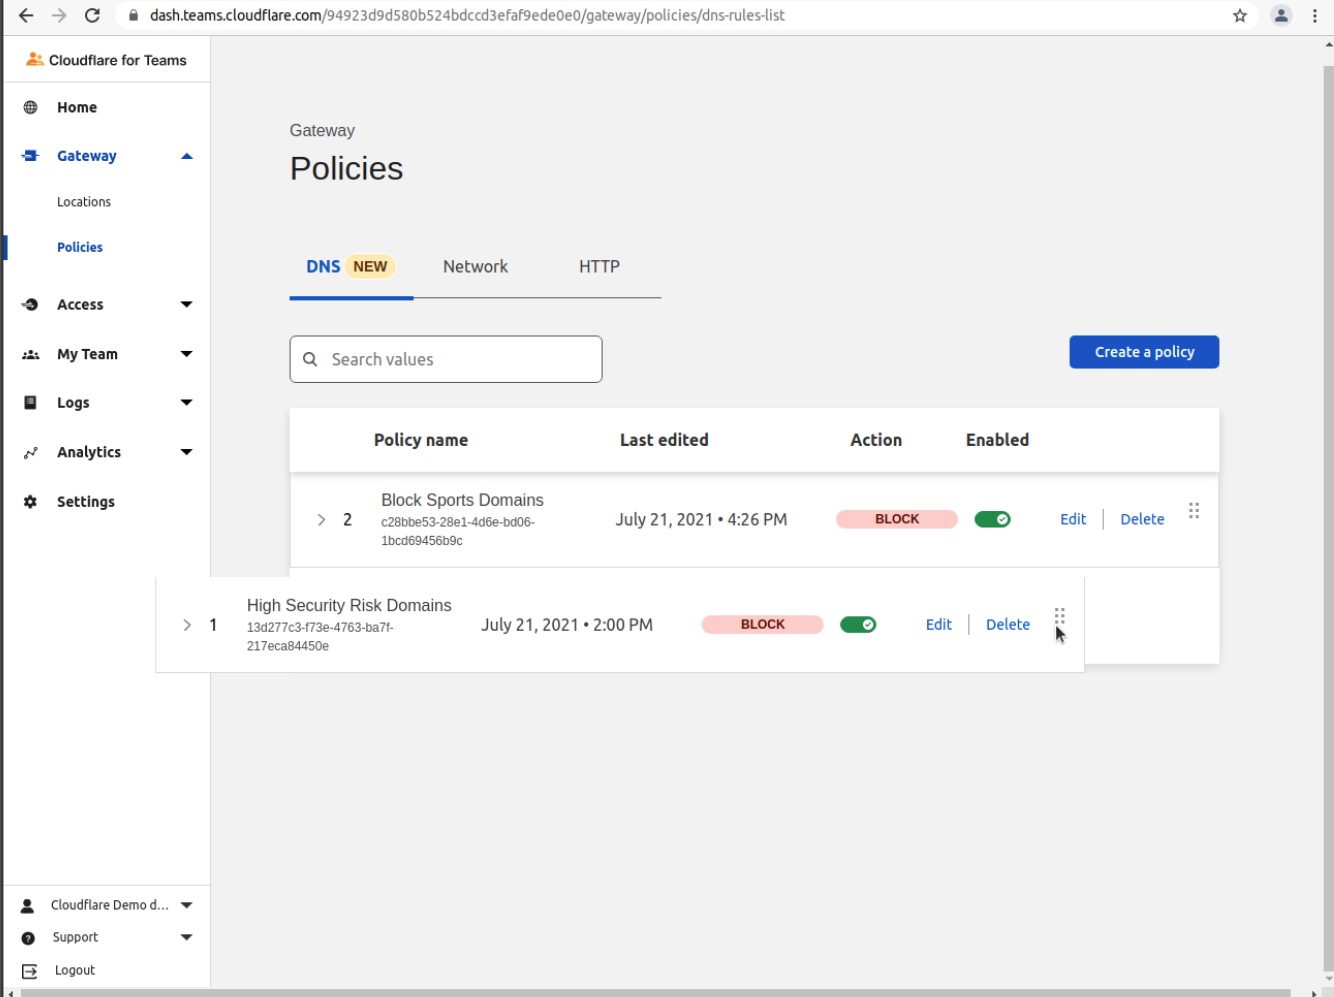
Confirm your new DNS Policy is visible
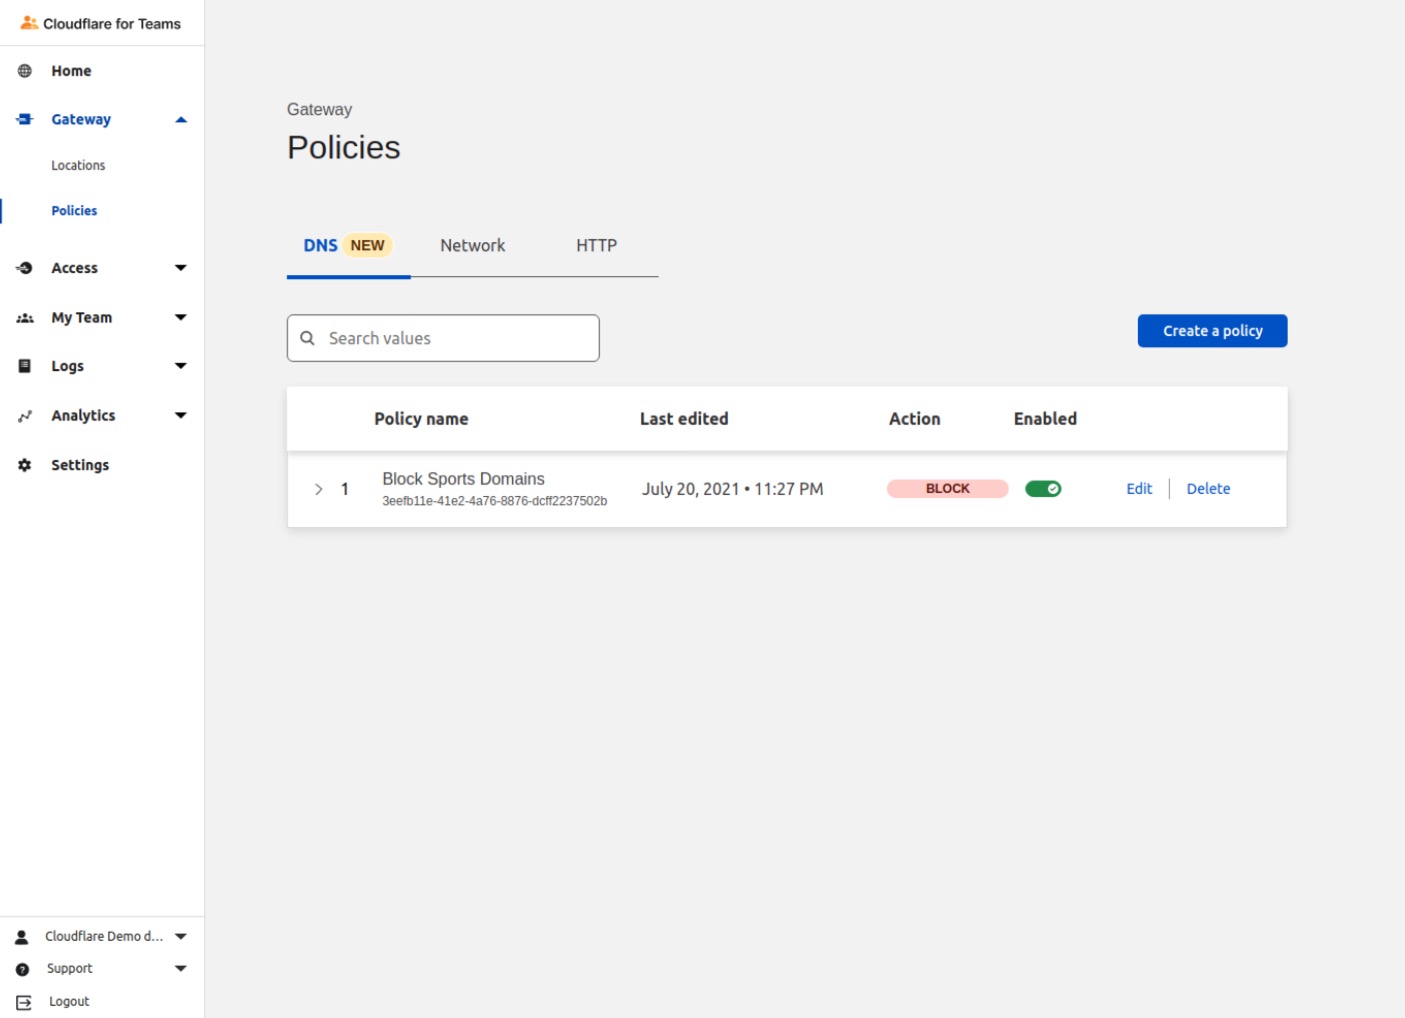
You can modify the order in which the rules are applied simply by dragging and dropping the policies using the hamburger icon on the right side of each rule
Additional DNS Policies
Some other recommendations for DNS Policies to test:
Content Categories - Adult Themes
Content Categories - Security Risks
Security Categories - All Security Risks
Validate with https://malware.testcategory.com
Cloudflare WARP
Cloudflare introduced the WARP client (1.1.1.1) almost two years ago. When it was released, the WARP client was designed to provide a secure connection to the Internet for mobile devices via a WireGard tunnel through the closest Cloudflare data center.
1.1.1.1 - WARP for Mobile Devices
Cloudflare 1.1.1.1: Faster Internet
Apple App Store (iOS)
https://apps.apple.com/us/app/1-1-1-1-faster-internet/id1423538627
Google Play Store (Android)
https://play.google.com/store/apps/details?id=com.cloudflare.onedotonedotonedotone&hl=en_US&gl=US
WARP for Desktop
Last year, WARP for Desktop was released to provide corporate customers with a way to provide customers with secure access to remote office workers. WARP is available for Windows, macOS, and Linux.
Introducing WARP for Desktop and Cloudflare for Teams
https://blog.cloudflare.com/warp-for-desktop/
WARP for Desktop
DNS Filtering
Send all DNS queries from roaming devices, on any network, to Cloudflare for DNS filtering.
Deploying DNS filtering with WARP does not require your team to configure source or destination IPs.
Web Proxy
You can proxy all traffic leaving devices through Cloudflare for HTTP inspection and filtering using the Cloudflare WARP client.
Private Networks (with Cloudflare Tunnel)
You can connect private networks and the services running in those networks to Cloudflare using Cloudflare Tunnel
End users can connect to those resources using the Cloudflare WARP agent by first authenticating into your organization’s account
Download WARP
https://developers.cloudflare.com/cloudflare-one/connections/connect-devices/warp/download-warp
Blog Posts
A Boring Announcement: Free Tunnels for Everyone
https://blog.cloudflare.com/tunnel-for-everyone/
BoringTun, a userspace WireGuard implementation in Rust
https://blog.cloudflare.com/boringtun-userspace-wireguard-rust/
Start building your own private network on Cloudflare today
https://blog.cloudflare.com/build-your-own-private-network-on-cloudflare/
dnscrypt
An honorable mention for dnscrypt…
The original blog post that was the inspiration for this event was based on using dnscrypt (an open-source project) for DNS-over-HTTPS recursive lookups in lieu of Cloudflare Tunnel.
Not only did we want to ensure that we layered in an additional Cloudflare offering, configuring Cloudflare Tunnel was FAR simpler than dnscrypt.
If you have any interest in seeing how dnscrypt was used in place of Cloudflare Tunnel, please refer to Jason Farber’s original blog post:
Deploying Gateway using a Raspberry Pi, DNS over HTTPS and Pi-hole https://blog.cloudflare.com/deploying-gateway-using-a-raspberry-pi-dns-over-https-and-pi-hole/